Marriot Homes (HVMB)
Introduction
HVMB (Marriot Homes) is one of the OTA channels where you can manage the connection, perform room and rate plan mapping, import data from the OTA, and configure other settings through the following tabs: Information , Username, Mapping, Assignments, and Settings.
Preparation
For HVMB, it’s different from other OTAs. While on other OTAs the listing/room type and rate plan are created through the OTA’s extranet, for HVMB these can be created directly through Bookandlink.
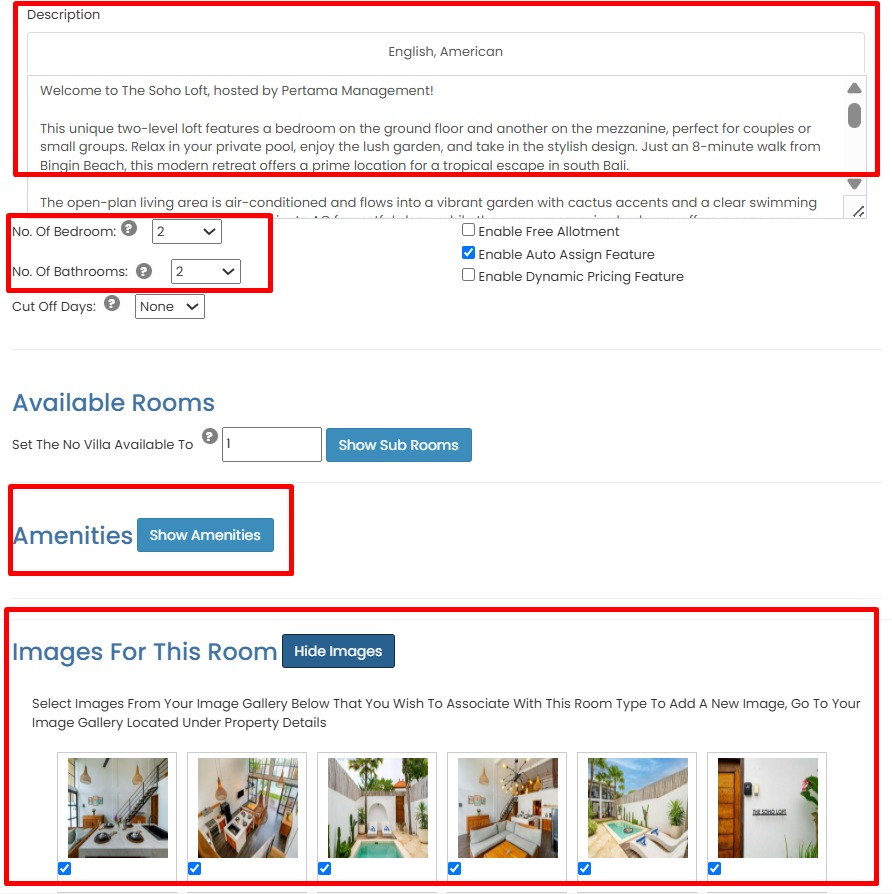
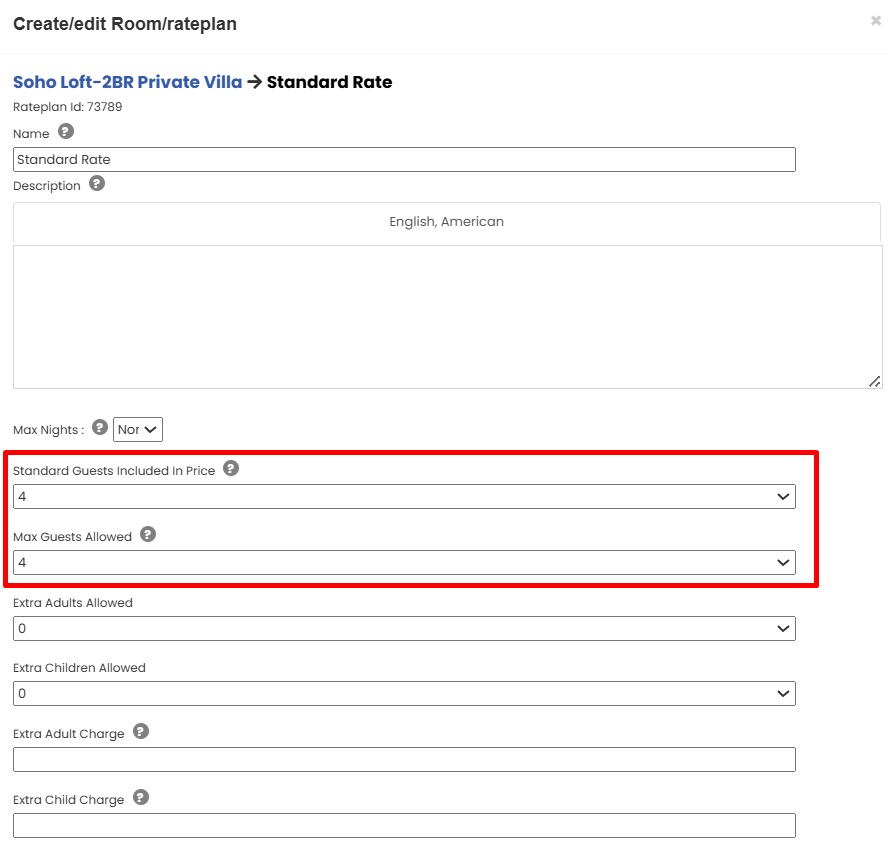
It will be need several information from Bookandlink channel manager setting room, such as Room description, Bed configuration, Bathroom configuration, Amenities, Images and Guest count. Please make sure that data already setting up on Bookandlink.
Setting → Rooms → Edit room type
Setting → Rooms → Edit rateplan
HVMB (Marriot Homes) Information
The HVMB (Marriot Homes) Information tab provides the basic connection procedure between the system and HVMB. Make sure you follow these steps:
| Step | Description |
|---|---|
| 1. Who can request connection? | HOTEL itself via Extranet |
| 2. Who must be contacted? | Connection can be requested through HVMB Agent /Market manager |
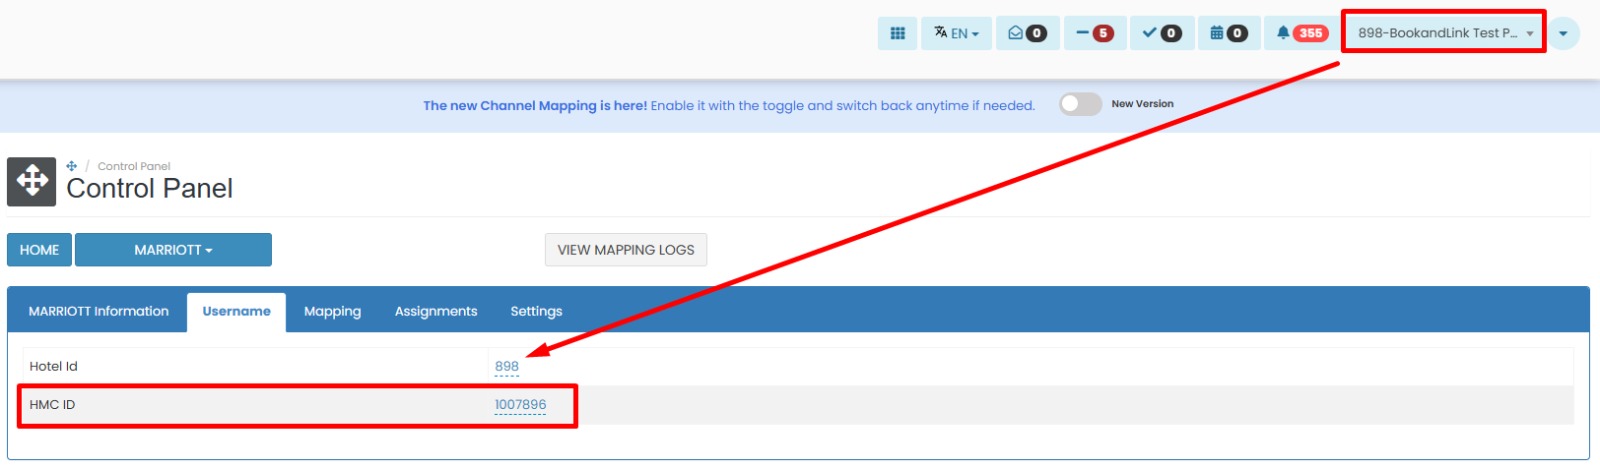
| 3. Which information is required to open connection? | HMC ID |
 |
[!NOTE]
Troubleshooting HMVB Information
Missing Hotel ID
- Locate the Hotel ID in your Bookandlink account before starting the connection.
- Find your HMC ID from HVMB local agent and copy the ID.
HVMB (Marriot Homes) Username
In the Username tab, you can enter or update the credentials required to connect to HVMB.
How to Update HVMB (Marriot Homes) credentials
- Enter the Hotel ID as registered in Bookandlink system.
- Enter HMC ID that received from HMVB local agent.
- Click the save (✓) button to apply the changes.
- If you don’t want to save the changes, click cancel (x)
[!NOTE]
Troubleshooting Credential Update
Failed to Save Hotel ID
- Make sure the email is valid and correctly copied from Pricelabs.
- Check your internet connection and try again.
Changes Not Reflected After Saving
- Refresh the page to confirm if the changes have been applied.
- If not saved, re-enter the Property ID and click the save (✓) button
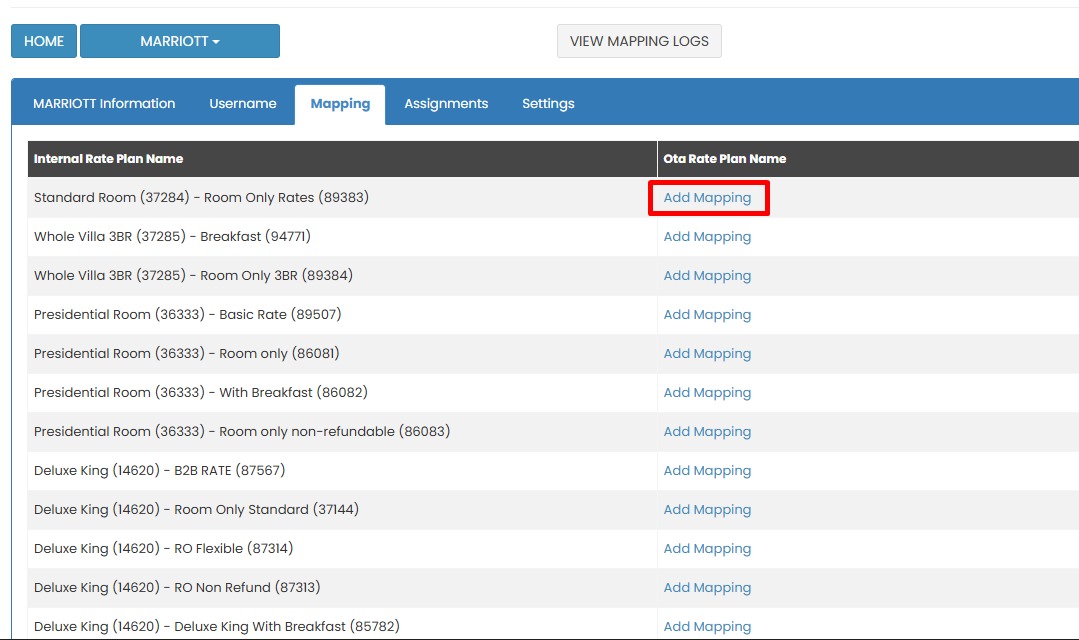
HVMB (Marriot Homes) Mapping
The Mapping tab allows you to link each internal rate plan to the corresponding room and rate plan in HVMB. For HVMB, the “Add Mapping” feature means creating a listing that will be automatically mapped once it has been created. After mapping the system will available to push rate, availability, and restriction data to the OTA.
How to Add Mapping/Cerate Listing
- On the Mapping tab, locate the Internal Rate Plan Name you want to map.
- Click Add Mapping next to the rate plan.
- Pop up will be appear for create your listing, please fulfill the detail based on property condition.
- If you don’t want to continue, click (x) to cancel the process
- When its done click Submit
- Status for you listing will be Pending and need waiting approval from HVMB side.
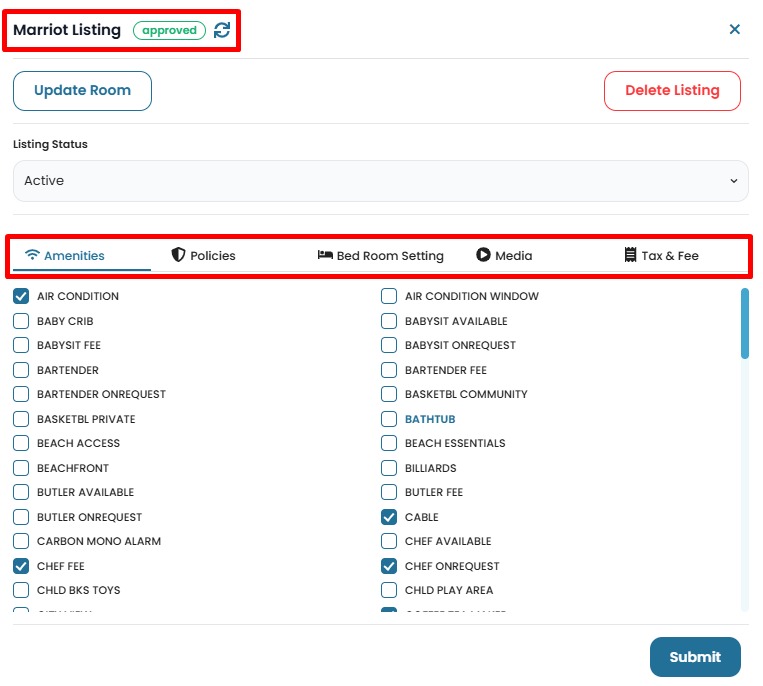
- After your listing status change to Approved, please Enable channel and do Push OTA update.
NOTE Mapping allows you to push rate, availability, and restrictions to HVMB once the mapping is complete.
[!NOTE]
Troubleshooting Mapping
Create listing page doesn’t appear
- Confirm that the latest data has been update on Bookandlink Setting Room & Rateplans.
- Make sure the HMC ID are correctly on username section.
Settings
The Settings tab allows you to manage how the system interacts with HVMB, including enabling the channel, configuring update behavior, and handling reservation processing.
How to Configure Settings
- Go to the Settings tab.
- Enable the Enable Channel option to activate the connection between your property and HVMB.
- Turn on Activate Updates to allow the system to push rate, availability, and restriction updates to HVMB.
- Enable Activate Reservations if you want to receive bookings from HVMB into the system. On this section as default always enable and can’t be disable.
- If you want the system to send an email voucher each time a reservation is received, enable the Send Reservation Voucher Email option.
- In the Currency (if Different) section, choose the currency if it differs from your system’s default. Enter the conversion rate and click Update.

How to Configure Manual OTA Update
- Scroll down to the OTA Update section.
- Click the OTA Update button to open the pop up window

- Complete all the form field below:
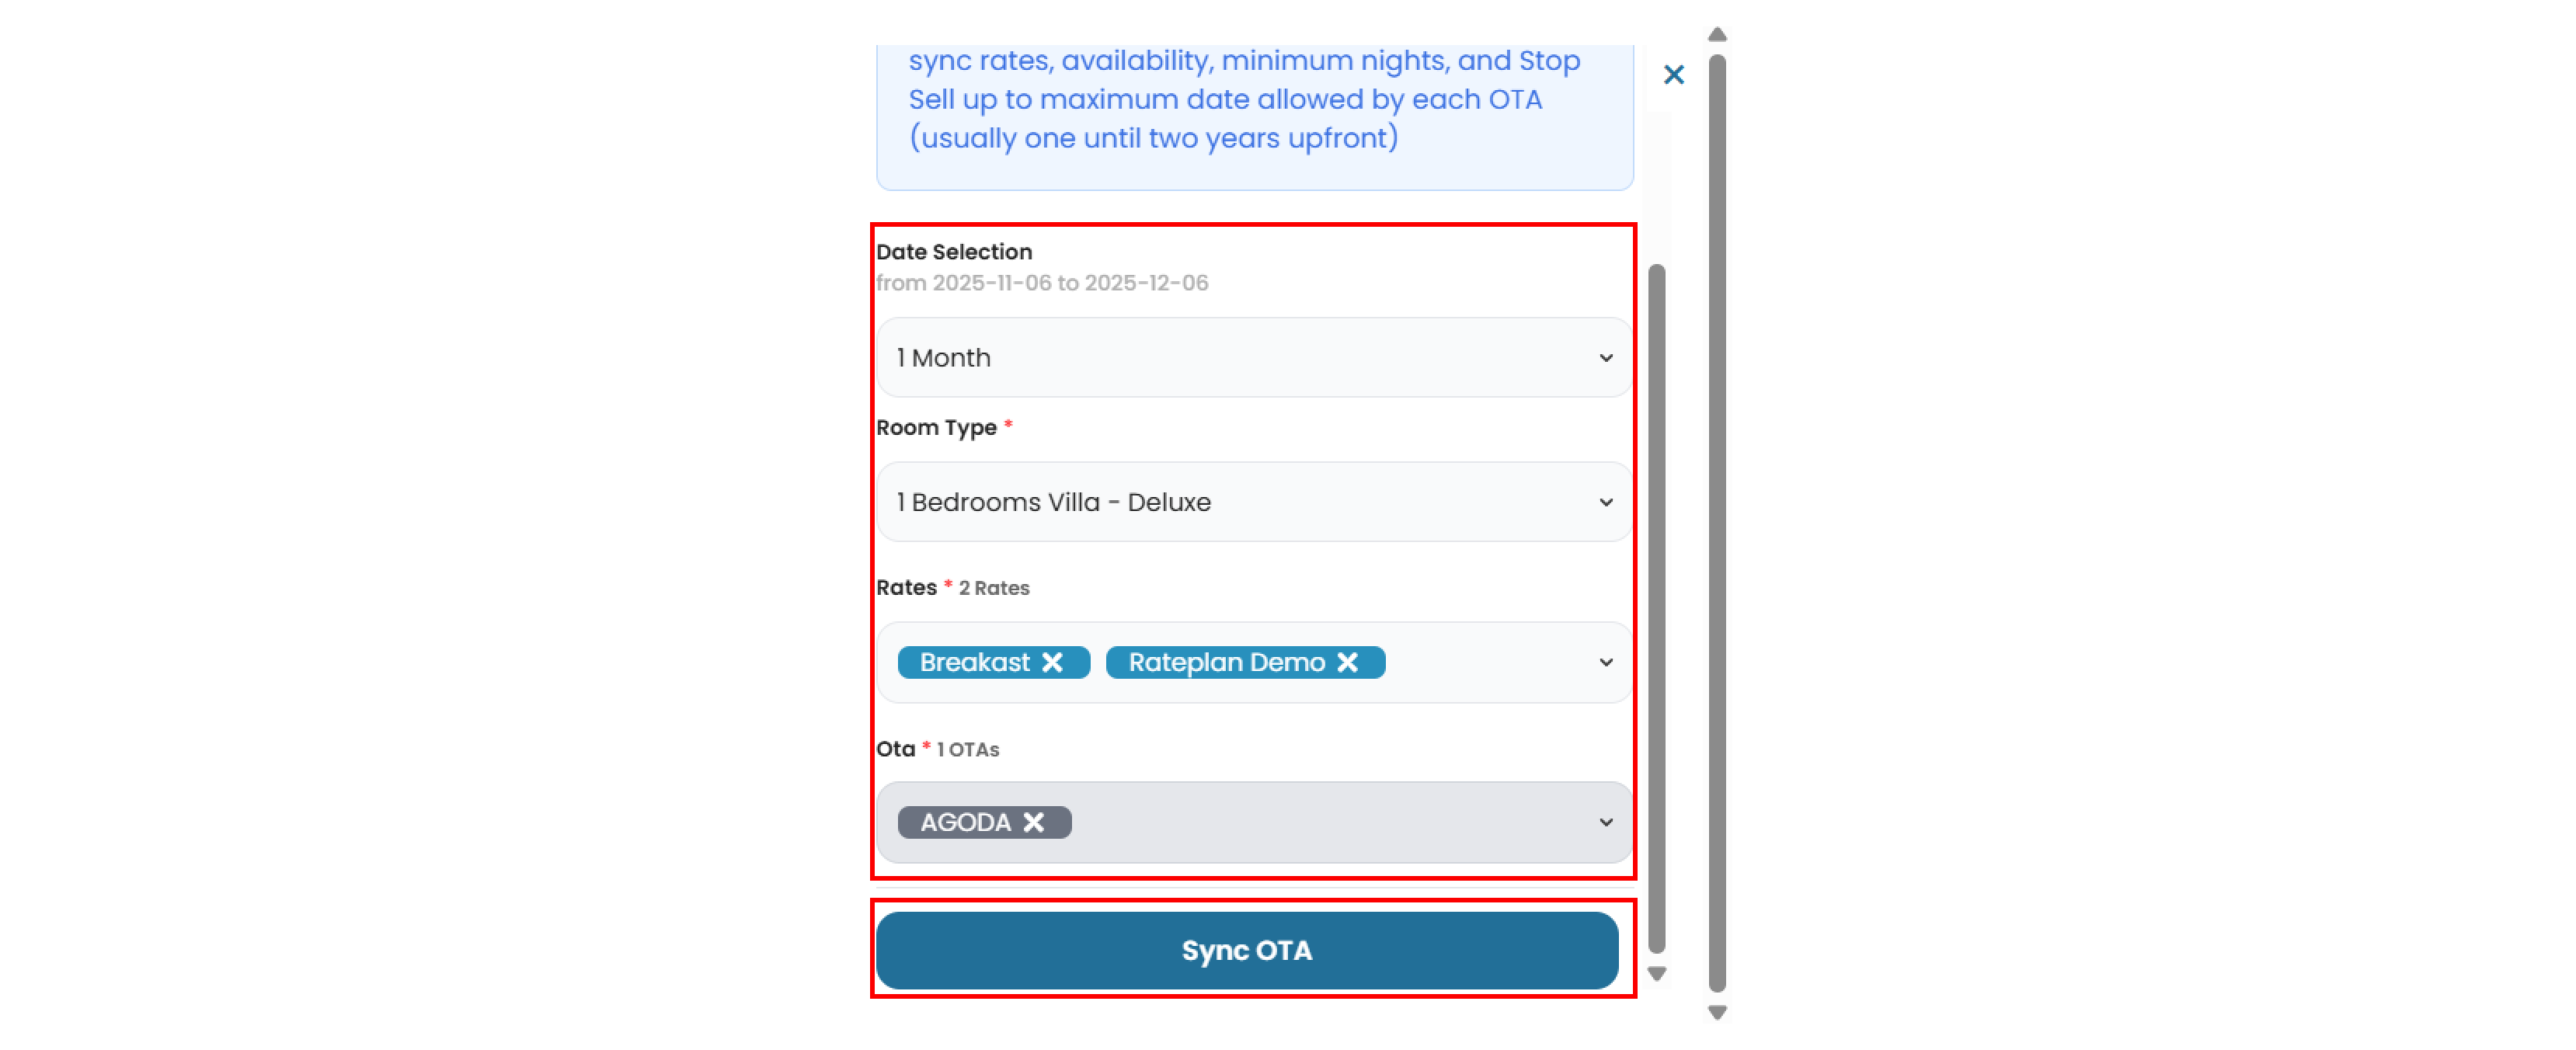
- Date Selection : Choose the duration of the OTA update (e.g 1 month, 3 months, etc)
- Room Type : Select the room type from the list.
- Rate : Choose one or more rate plans. You can also select all rate plan if needed.
- Click Sync OTA to save and apply the changes.