Introduction
The Mapping feature allows you to connect your internal room and rate plans in Channel Manager with external room and rate plans from Property Management System (PMS).
This process ensures that room availability, rates, restrictions, and reservations are synchronized correctly between your property system and the connected partner platform.
Rooms and Rateplan
Unlike OTAs, where you must click 'Import Room' to pull rate plans, mapping with PMS Partner requires you to manually create the rate plans within the Rooms tab. .
Before create a rate plan, the partner must be share their active room and rate code on PMS side to client who handle the connection so they can adding the room and rate code on channel manager side for mapping.
How to Adding Room and Rateplan
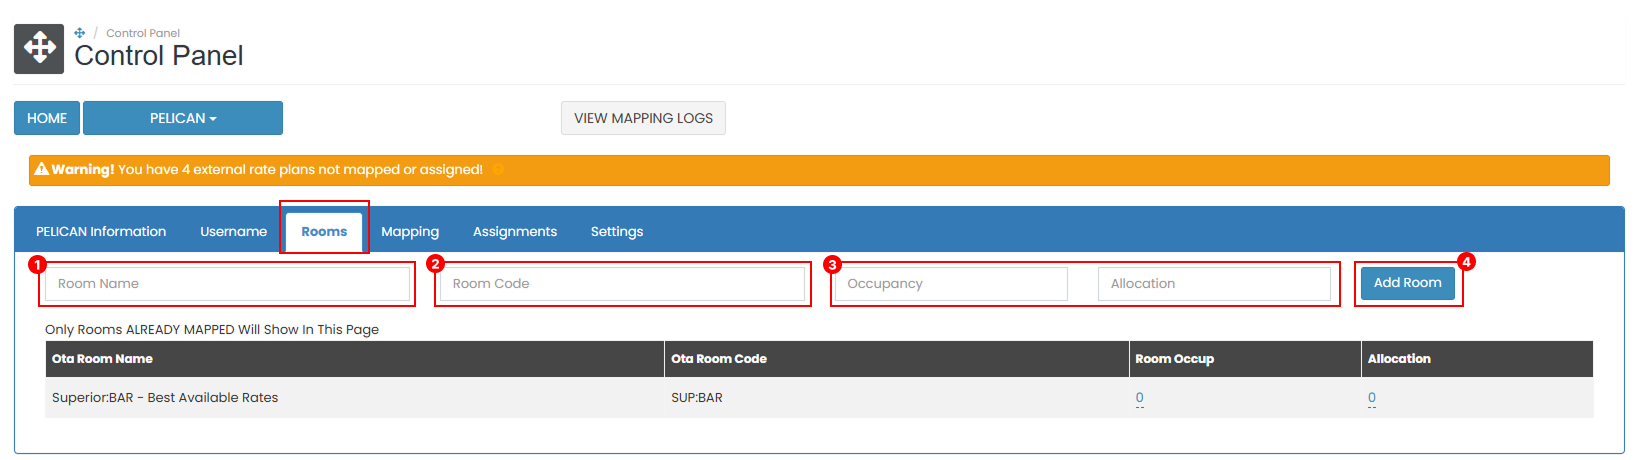
- On the Rooms tab, enter the room name of your rateplan on Room Name textbox.
- Put the PMS Room and rateplan code on Room Code separated with ":"
e.g.,
DLXD:OTA-RO(its mean room code DLXD with rateplan code OTA-RO. - Fill in the Occupancy and Allocation fields (optional).
- Click Add Room to create the new rate plan.
- The created rate plan will appear in the mapping list and will be available for use during the mapping process later.
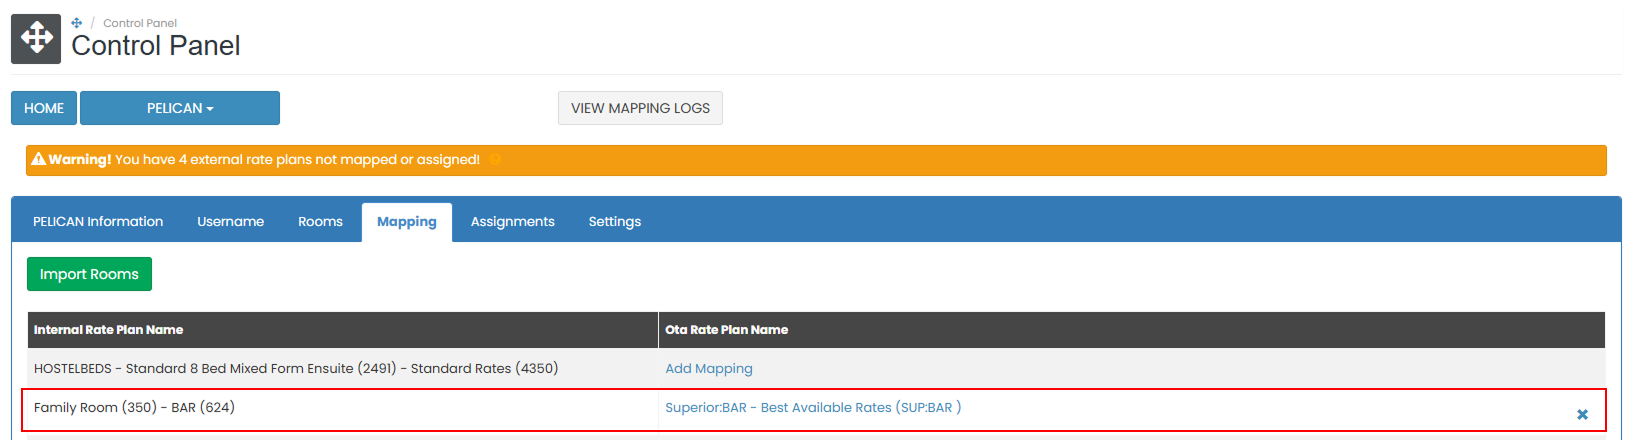
Mapping
Mapping with a PMS Partner allows the partner to push rates, availability, and restrictions to Channel Manager. It also enables the partner to receive reservations from Channel Manager.
How to Add Mapping
- On the Mapping tab, locate the Internal Rate Plan Name you want to map. Then click Add Mapping next to the rate plan.
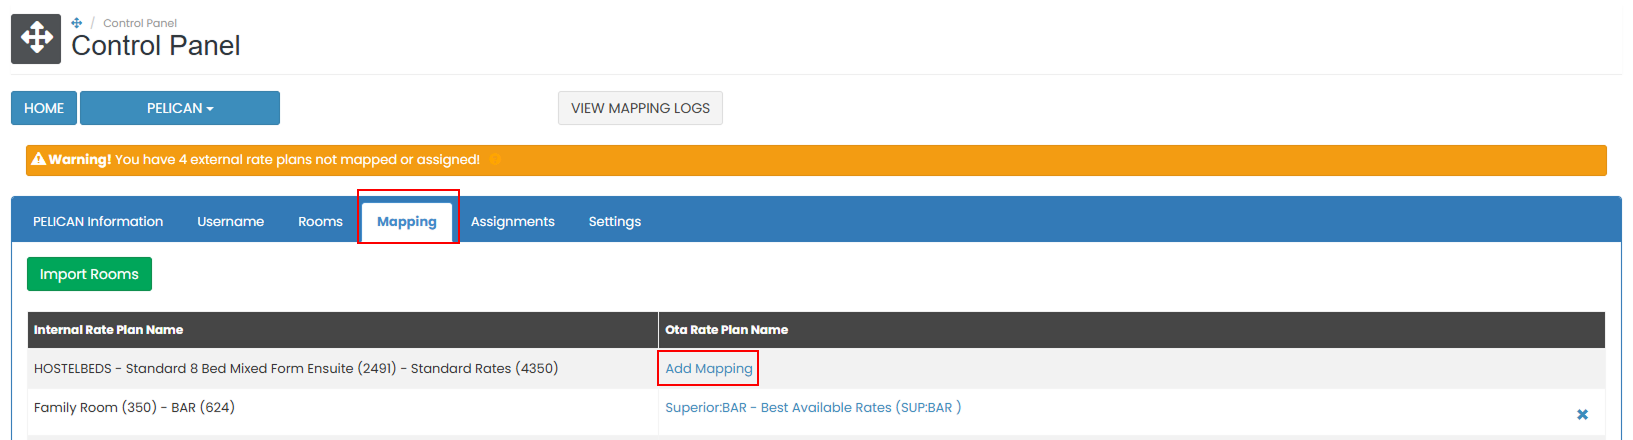
- A list of available room and rate plan combinations from Rooms tab will appear. Only room and rate plans that have already been created and have not yet been mapped to an internal room will be displayed in this list.
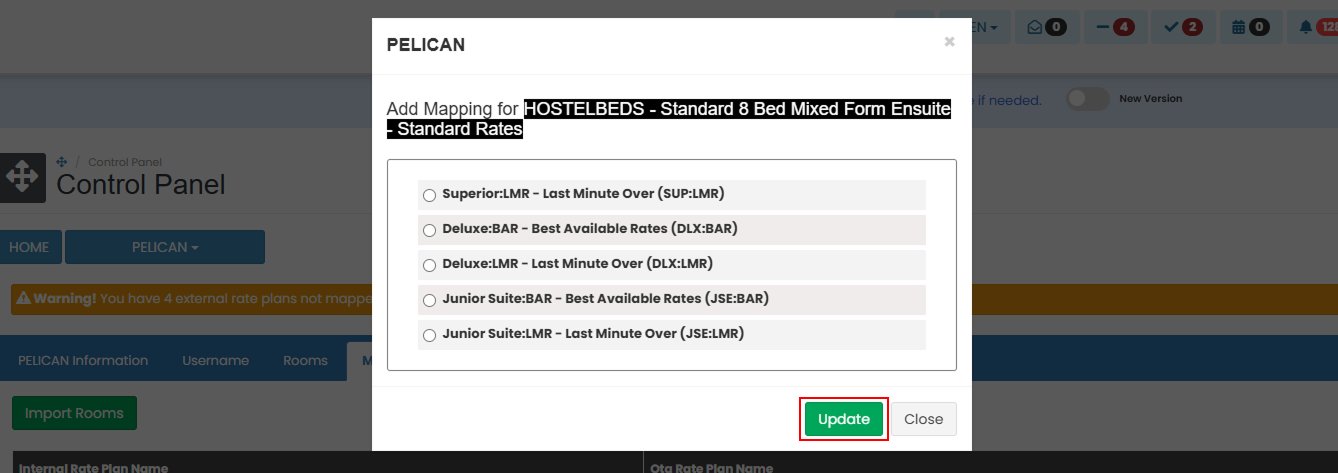
- Select one option that matches the room and rate plan you want to connect, and click Update to save the mapping.
- If you don’t want to continue, click Close to cancel the process.
- Please make sure all OTA rateplan are mapped or assign, any rateplan miss map or assign can causing error on coming reservation. The successfully mapped rooms will appear in:
- The rooms list
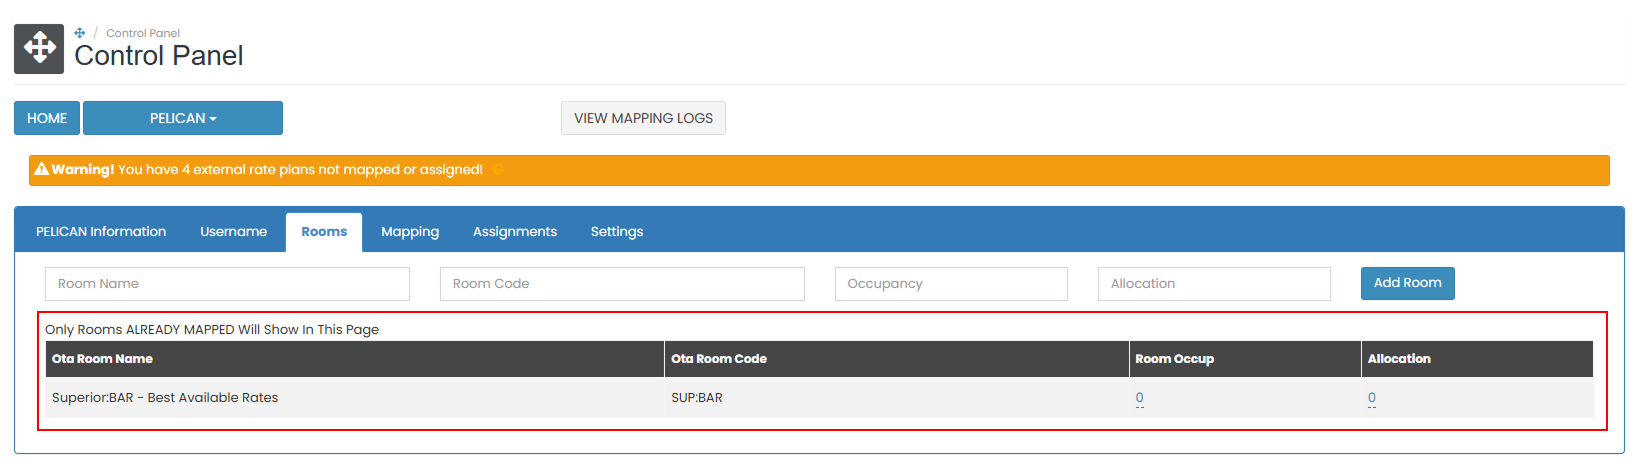
- The mapping list.
- The rooms list
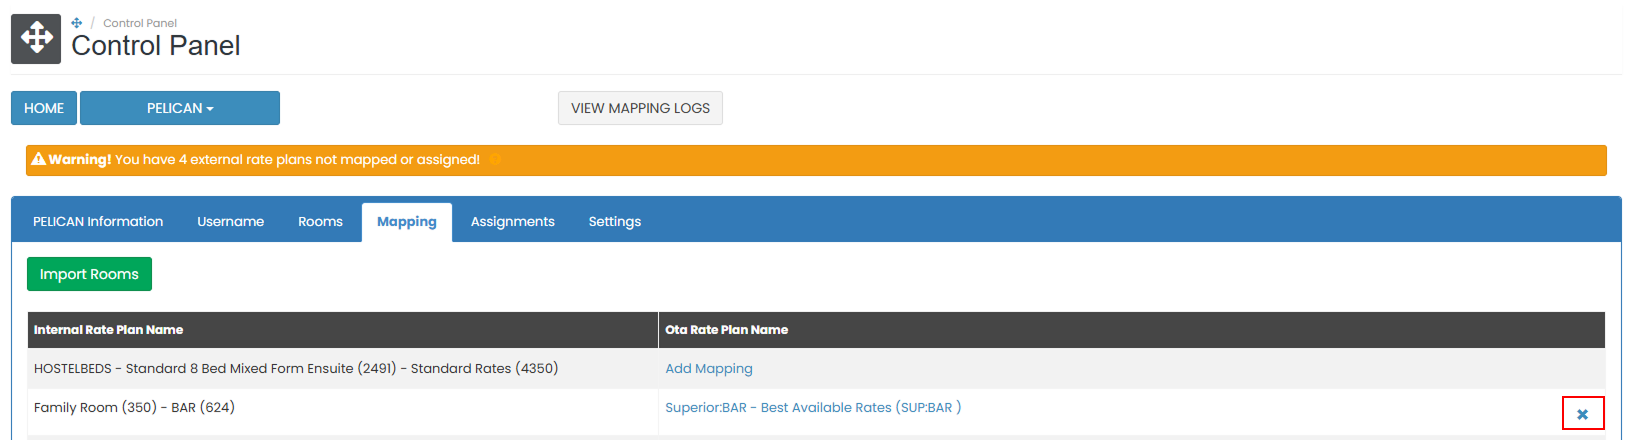
How to Unmapped Rooms
If you need to update or change an existing mapping, you must first remove the current one. To unmap a room, click the Remove (×) button next to the mapped room.

[!NOTE]
Troubleshooting Mapping
No Room or Rate Plan Appears for Mapping
- Ensure you have adding room and rate code from partner through the Rooms tab.
Unable to Save Mapping
- Check that a room and rate plan are selected before clicking Update.
- If the mapping fails to save, try refreshing the page and repeating the process
Mapping Status Indicators
The system provides visual indicators to help you quickly identify the mapping status of your rooms and rate plans. These indicators help ensure that all rooms are properly connected, allowing accurate synchronization of availability, rates, and reservations across systems.
Yellow Warning Sign
Indicates that there are rooms or rate plans that have not yet been mapped.
 This commonly appears right after importing rooms from an OTA, IBE, or PMS. It serves as a reminder that the imported rooms still need to be mapped. The indicator also shows the number of rooms or rate plans that remain unmapped.
Green Indicator
Indicates that all imported and available rooms and rate plans have been successfully mapped.

Assignment
The Assignments feature allows you to link child rate plans from connected partner to your internal rate plans for reservation purposes. This is a receive-only function, which means it supports receiving reservations only and does not allow sending rates, availability, or restriction updates.
How to Assign Child Rates
- On the Assignments tab, find the OTA Rate Plan Name you want to assign. Then click Add Internal Rateplan next to the selected OTA rate plan.
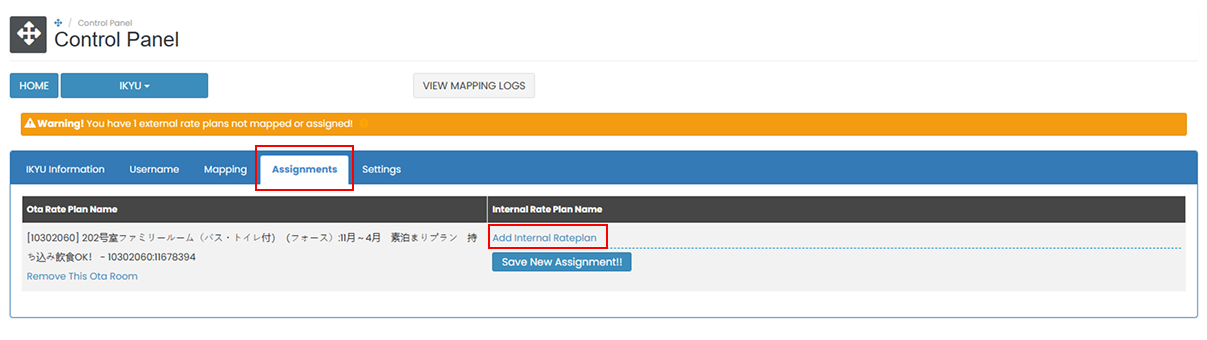
- Select the internal rate plan from the dropdown list.

- Click Save New Assignment to complete the assignment. If you want to cancel the process, click the cancel button before saving.
- If needed, you can remove a previously assigned rate plan by clicking the Remove button.
[!NOTE]
Troubleshooting Assignments
Cannot find internal rate plan in the dropdown
- Ensure the internal rate plan exists in the system before assigning.
- Refresh the page to load the latest list of rate plans.
Assignment saved but reservations not received
- Confirm the assignment was saved correctly.
- Make sure the rate plan is active on partner and eligible for reservation delivery.
Unable to remove assigned rate plan
- If the Remove This Ota Room button does not respond, try refreshing the page.
- Ensure your user role has permission to modify assignments.