Settings
Settings allow each property to configure system behavior based on operational needs. This includes options for automation, visibility control, report delivery, and customization of room display in the booking chart.
How to Configure Basic Settings
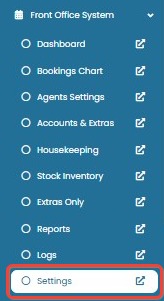
- Go to Hotelku > Settings.
- Under the Basic Setting section, configure the following options:
- Automatic Emails
Use the dropdown to define how email notifications are sent when a reservation is created or edited:- Disable: No email is sent.
- Hotel Only: Email is sent to the hotel only.
- Hotel and Client: Email is sent to both the hotel and the guest.
- Auto Room Status Change
Toggle ON to automatically change the room status to Out of Service when a Room Maintenance is created. - Hidden Mode for Room Maintenance
Toggle ON to hide rooms under maintenance from the Booking Chart view. - Automatic Report Emails
Toggle ON to enable the system to send Daily Reports automatically via email to the property owner. - Send Sales Report to Owner by Email
Use the dropdown to set how often sales reports are sent via email to the owner:- Disable: Do not send sales reports.
- Daily: Send sales report every day.
- Monthly: Send sales report once per month.
- Auto Add Tax
Toggle ON to apply tax automatically to reservations made through FOS or the Booking Engine.
The applied tax follows the configuration in Booking Policy. - Ignore Inventory Check
Toggle ON to allow reservation creation even if the room inventory is 0.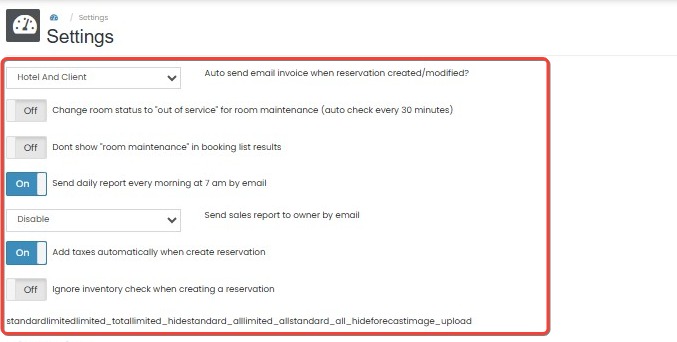
- Automatic Emails
Changes in settings are not saved
- Ensure you have the proper user permissions to modify settings. Only authorized users can save changes in the settings panel.
- After making changes, make sure to wait for the success confirmation before navigating away from the page.
- Try refreshing the page and reapplying the settings if they don’t appear updated.
Automatic emails are not being sent
- Check if the Automatic Emails option is set to Disable. To enable email notifications, switch it to Hotel Only or Hotel and Client.
- Ensure that the guest's or hotel’s email addresses are correctly configured and active.
- Verify that the system's email service is operational and not blocked by email spam filters.
Room not marked as Out of Service during maintenance
- Confirm that Auto Room Status Change is toggled ON. If OFF, the room will not change status automatically.
- Make sure a valid Room Maintenance entry has been created and assigned to a room.
Rooms under maintenance are still visible in Booking Chart
- Check if Hidden Mode for Room Maintenance is toggled ON. If OFF, maintenance rooms will still appear.
- Refresh the Booking Chart to ensure the latest room status is reflected.
Owner is not receiving daily or monthly sales reports
- Confirm the Send Sales Report to Owner by Email dropdown is not set to Disable.
- Make sure the owner’s email address is correctly registered and verified.
- Ensure the property has valid sales data to report within the selected period.
Reservations made through FOS or Booking Engine are not taxed
- Verify that Auto Add Tax is toggled ON.
- Confirm the tax configuration is correctly defined under Booking Policy.
- Refresh the reservation page or reinitiate the booking to apply updated tax rules.
System prevents reservation when inventory is 0
- Ensure Ignore Inventory Check is toggled ON if you want to allow overbooking.
- If still blocked, check whether the room type has hard inventory restrictions set elsewhere in the system.
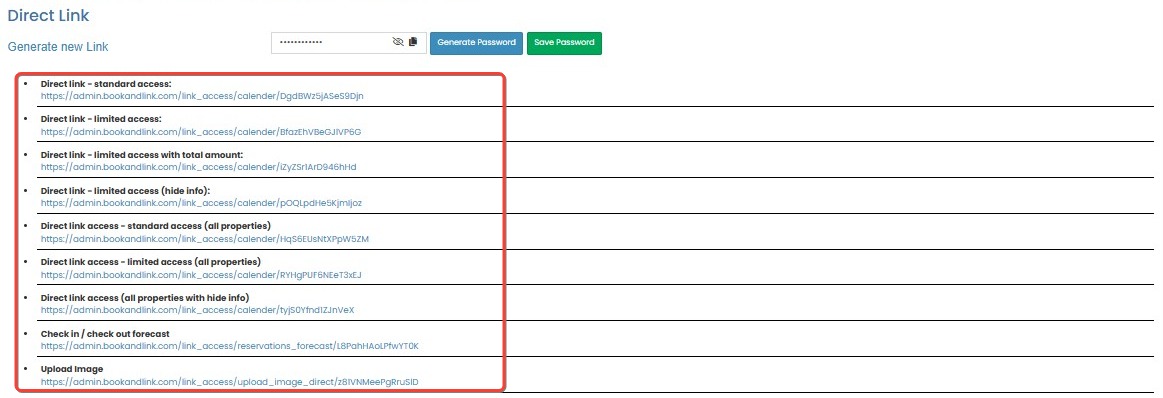
How to Use Direct Link
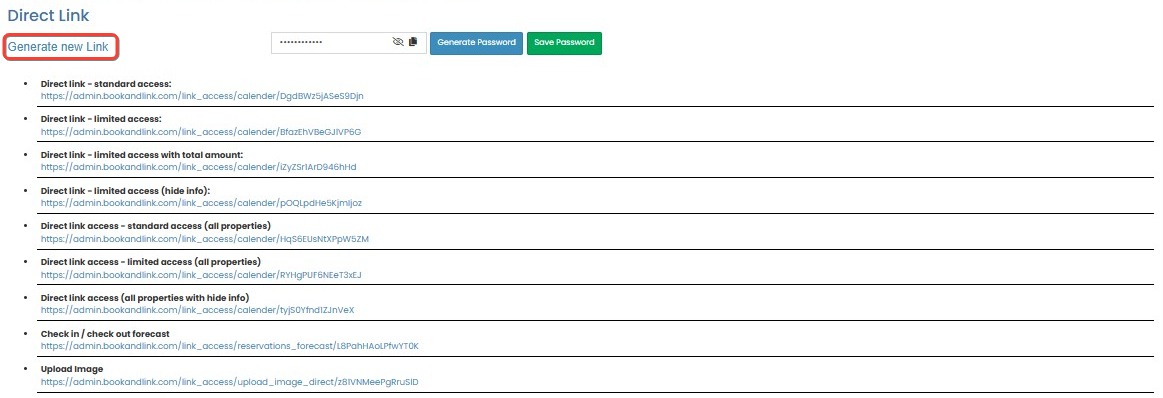
The system provides Direct Link access to selected pages without requiring login. This allows limited access to view-only versions of internal tools.
- In the Settings page, locate the Direct Link section.
- Click Generate new Link to create a new access link.
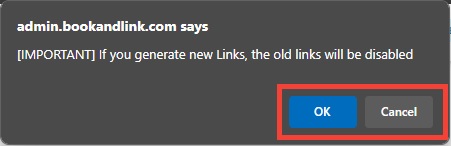
- A confirmation popup will appear with the following message:
"If you generate new Links, the old links will be disabled." - Click OK to proceed.
- The system will generate a new set of links.
Important: Generating a new link will deactivate all previously generated links.
Generated link does not work
- Ensure you have clicked OK on the confirmation popup after clicking Generate new Link.
- Make sure the link was copied correctly—check for missing or extra characters.
- If the link still doesn’t open, verify that your browser or network isn’t blocking access due to security settings.
Previous direct link becomes invalid
- This is expected behavior. When a new link is generated, all previously generated links are automatically disabled. Always use the latest link provided.
Direct link opens login page instead of the intended view
- Confirm the link you’re using is from the most recent generation.
- Double-check that the destination page still supports direct link access. Some modules may require login if permissions or system rules have changed.
Accidentally generated a new link and lost access to the old one
- Unfortunately, old links cannot be recovered once a new link is generated. You must distribute the new link to all necessary recipients.
Recipients cannot view the page using the direct link
- Make sure the shared link was not modified or truncated when copied.
- Confirm with the recipient that they are opening the link in a modern browser that supports the platform.
- Ensure the system’s view-only mode is functioning properly—contact support if the page fails to load or shows an error.
How to Set Password for Direct Link
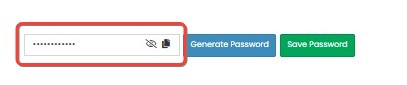
- In the Settings page, locate the Password section.
- In the Password field:
- Click Generate Password to create one automatically, or
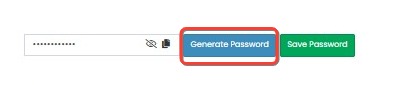
- Enter a custom password manually.
- Click Generate Password to create one automatically, or
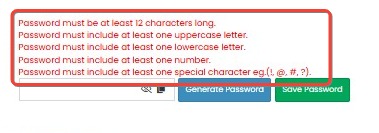
- Manual passwords must:
- Minimum 12 characters long.
- Must include at least 1: uppercase, lowercase, a number and special characters.
- Click Save Password to apply.
- This password is required whenever someone accesses the Direct Link.

Failed to save password
- Ensure the password meets all requirements: minimum 12 characters, includes at least one uppercase letter, one lowercase letter, one number, and one special character.
- Double-check for accidental spaces at the beginning or end of the password field.
Direct Link still accessible without a password
- Verify that the password was successfully saved by clicking Save Password.
- Refresh the page or re-open the link in an incognito window to test if the password prompt appears.
- If issue persists, try regenerating the Direct Link and setting the password again.
Password prompt not appearing for users
- Confirm that the Direct Link being shared is the latest version and not an older one generated before password was set.
- Ensure the browser doesn’t cache an older session. Ask the user to try using the link in incognito/private mode.
Users cannot access Direct Link even after entering correct password
- Double-check that the password shared matches exactly, including character case and special symbols.
- Try resetting the password and sharing the updated one again.
- If the issue continues, verify whether the Direct Link feature is still active in the system settings or contact system support.
How to Change Room and Subroom Names and Order
This section allows you to manage room and subroom information displayed on the Booking Chart, including room names, display order, and owner assignments.
Assign a Room Owner
You can assign an owner to each subroom for reporting and management purposes.
- On the Settings page, scroll down to the Change Rooms/Subrooms Names and Orders section.
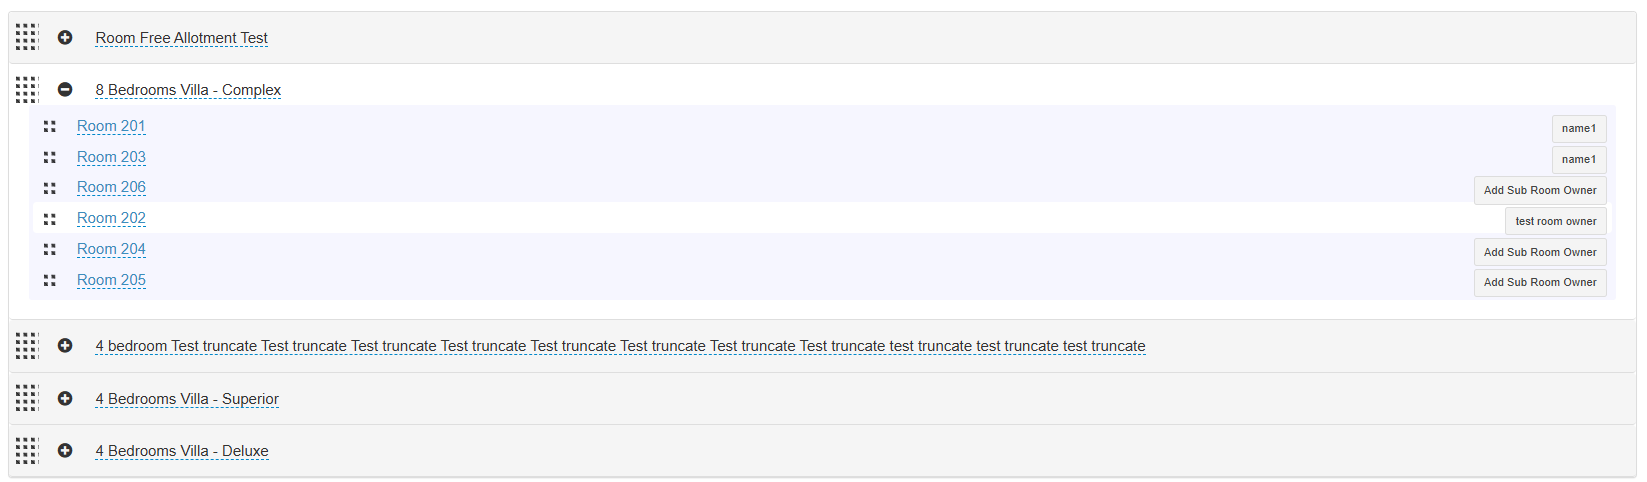
- In the room list, click the ➕ (plus) icon next to a room to expand its subroom details.
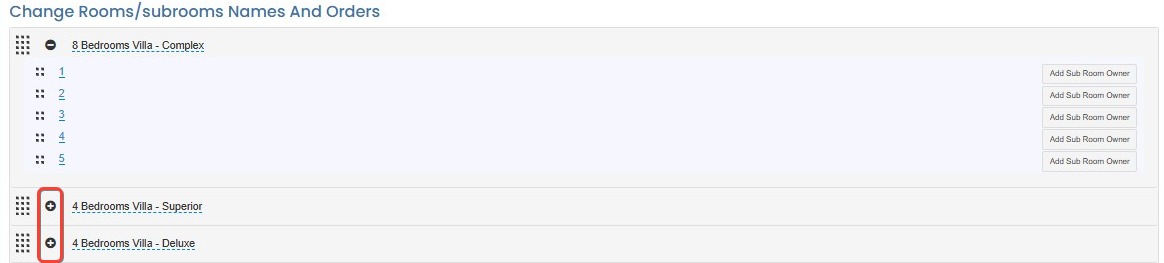
- Click the ➖ (minus) icon to collapse the subroom list.
- To assign an owner to a subroom:
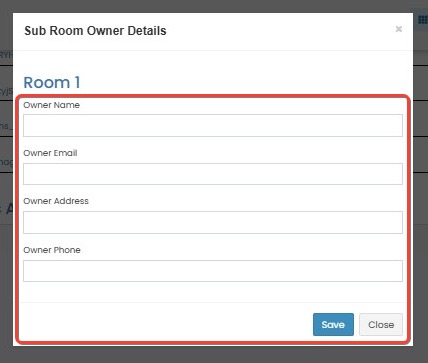
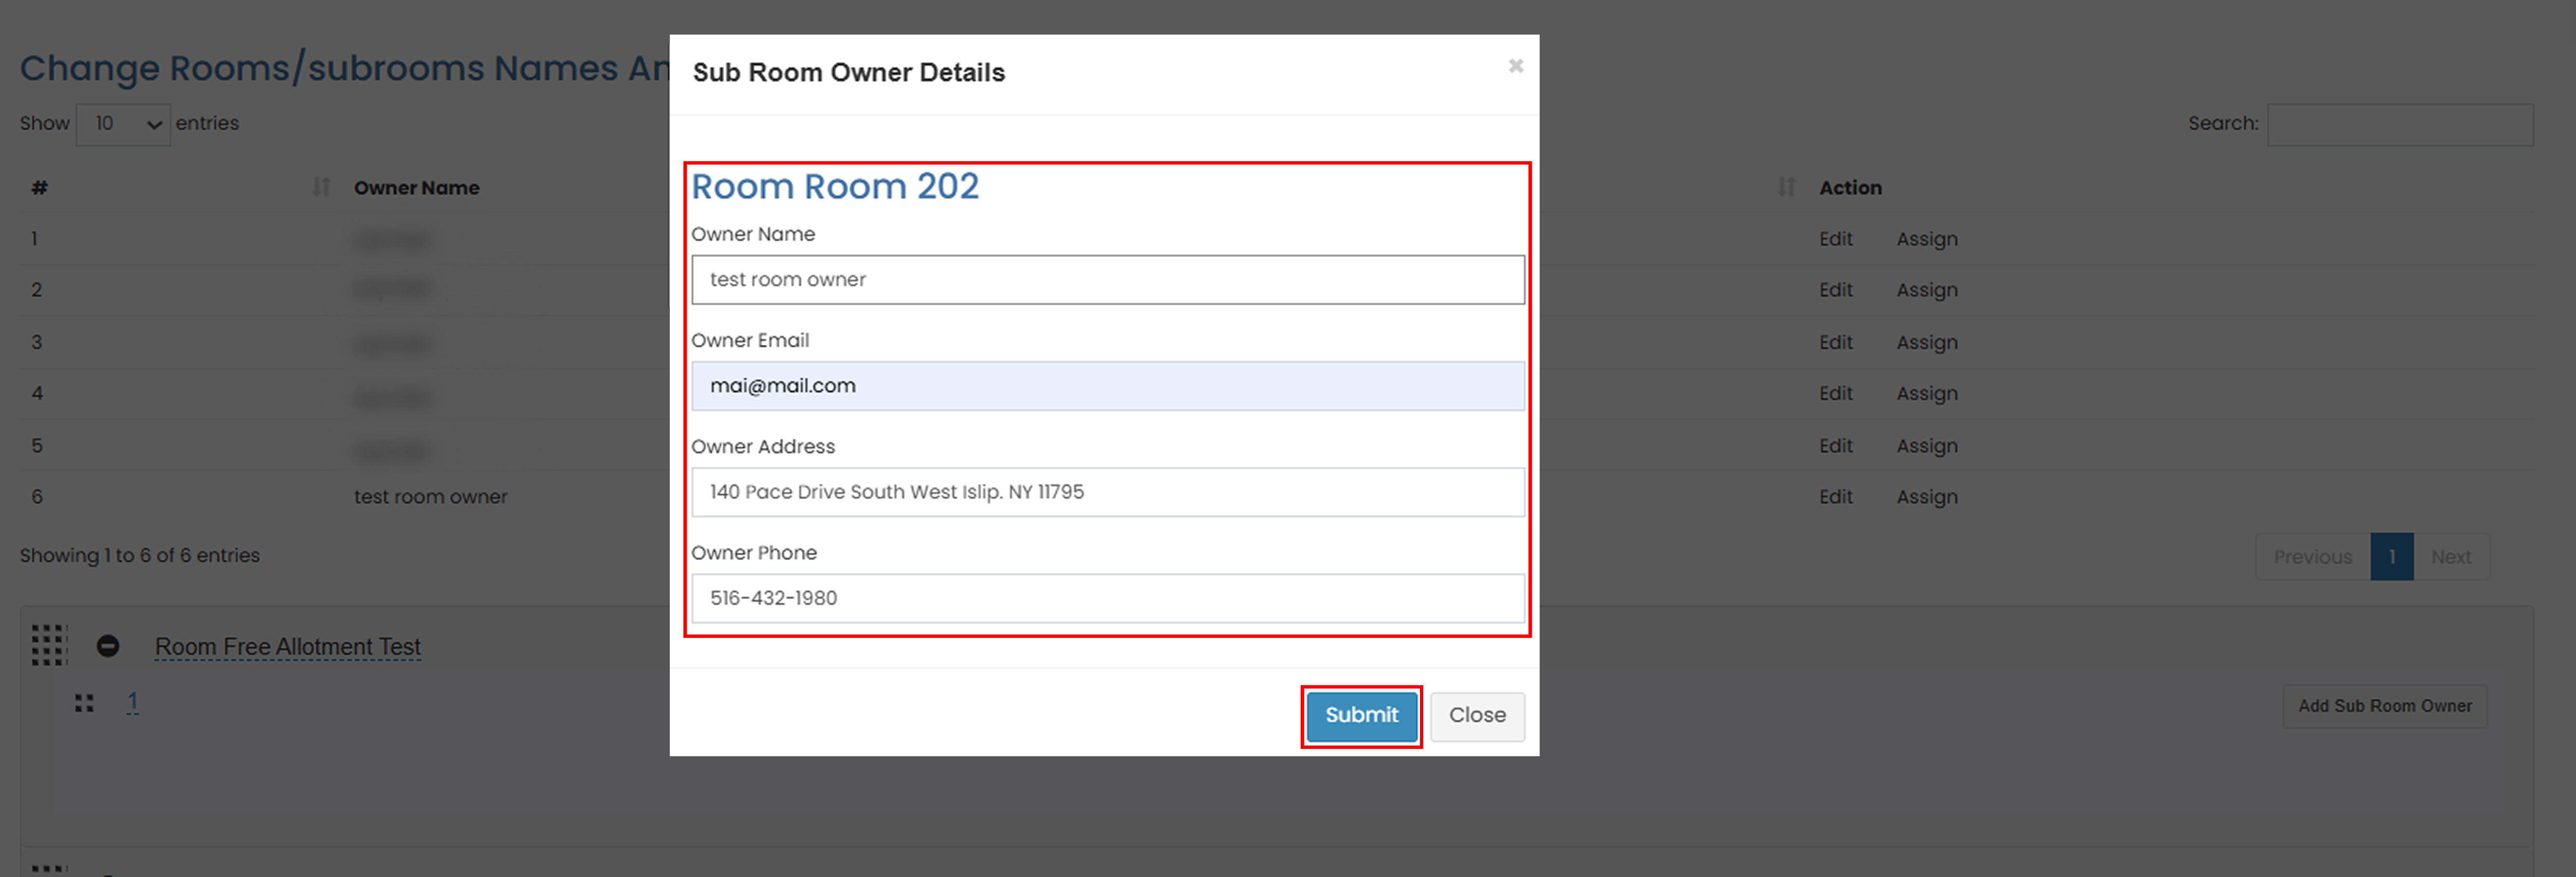
- Click Add Sub Room Owner.
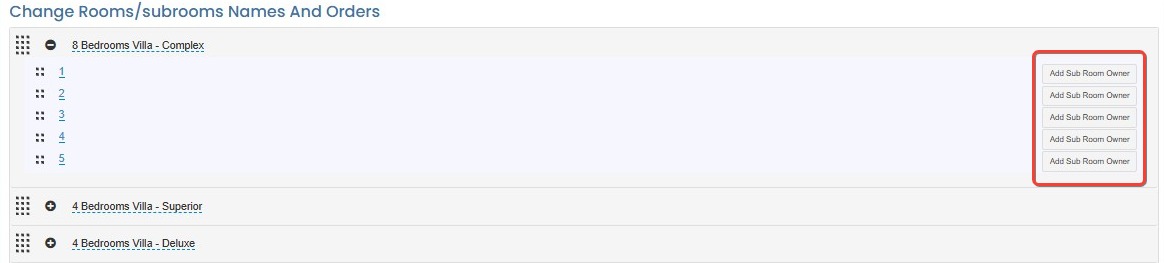
- Enter the information of Owner name, email, address and phone. Then click save to assign the owner.
- Click Add Sub Room Owner.
Assign Multiple Rooms to an Owner
Overview
This feature is only available to support multiple-owners within your property management. If you do not see the Group List section, the property does not support it.
 Each owner group is uniquely identified by a combination of owner name and owner email, which prevents duplicate groups from being created. This feature will support the report division you may see in owner report, each owner will only see only room that assign to them.
How to Assign Room
To assign multiple rooms or subrooms:
- If the Group List is empty, first assign an owner to any room or subroom. This will automatically create an owner group. See the steps in Assign a room owner.
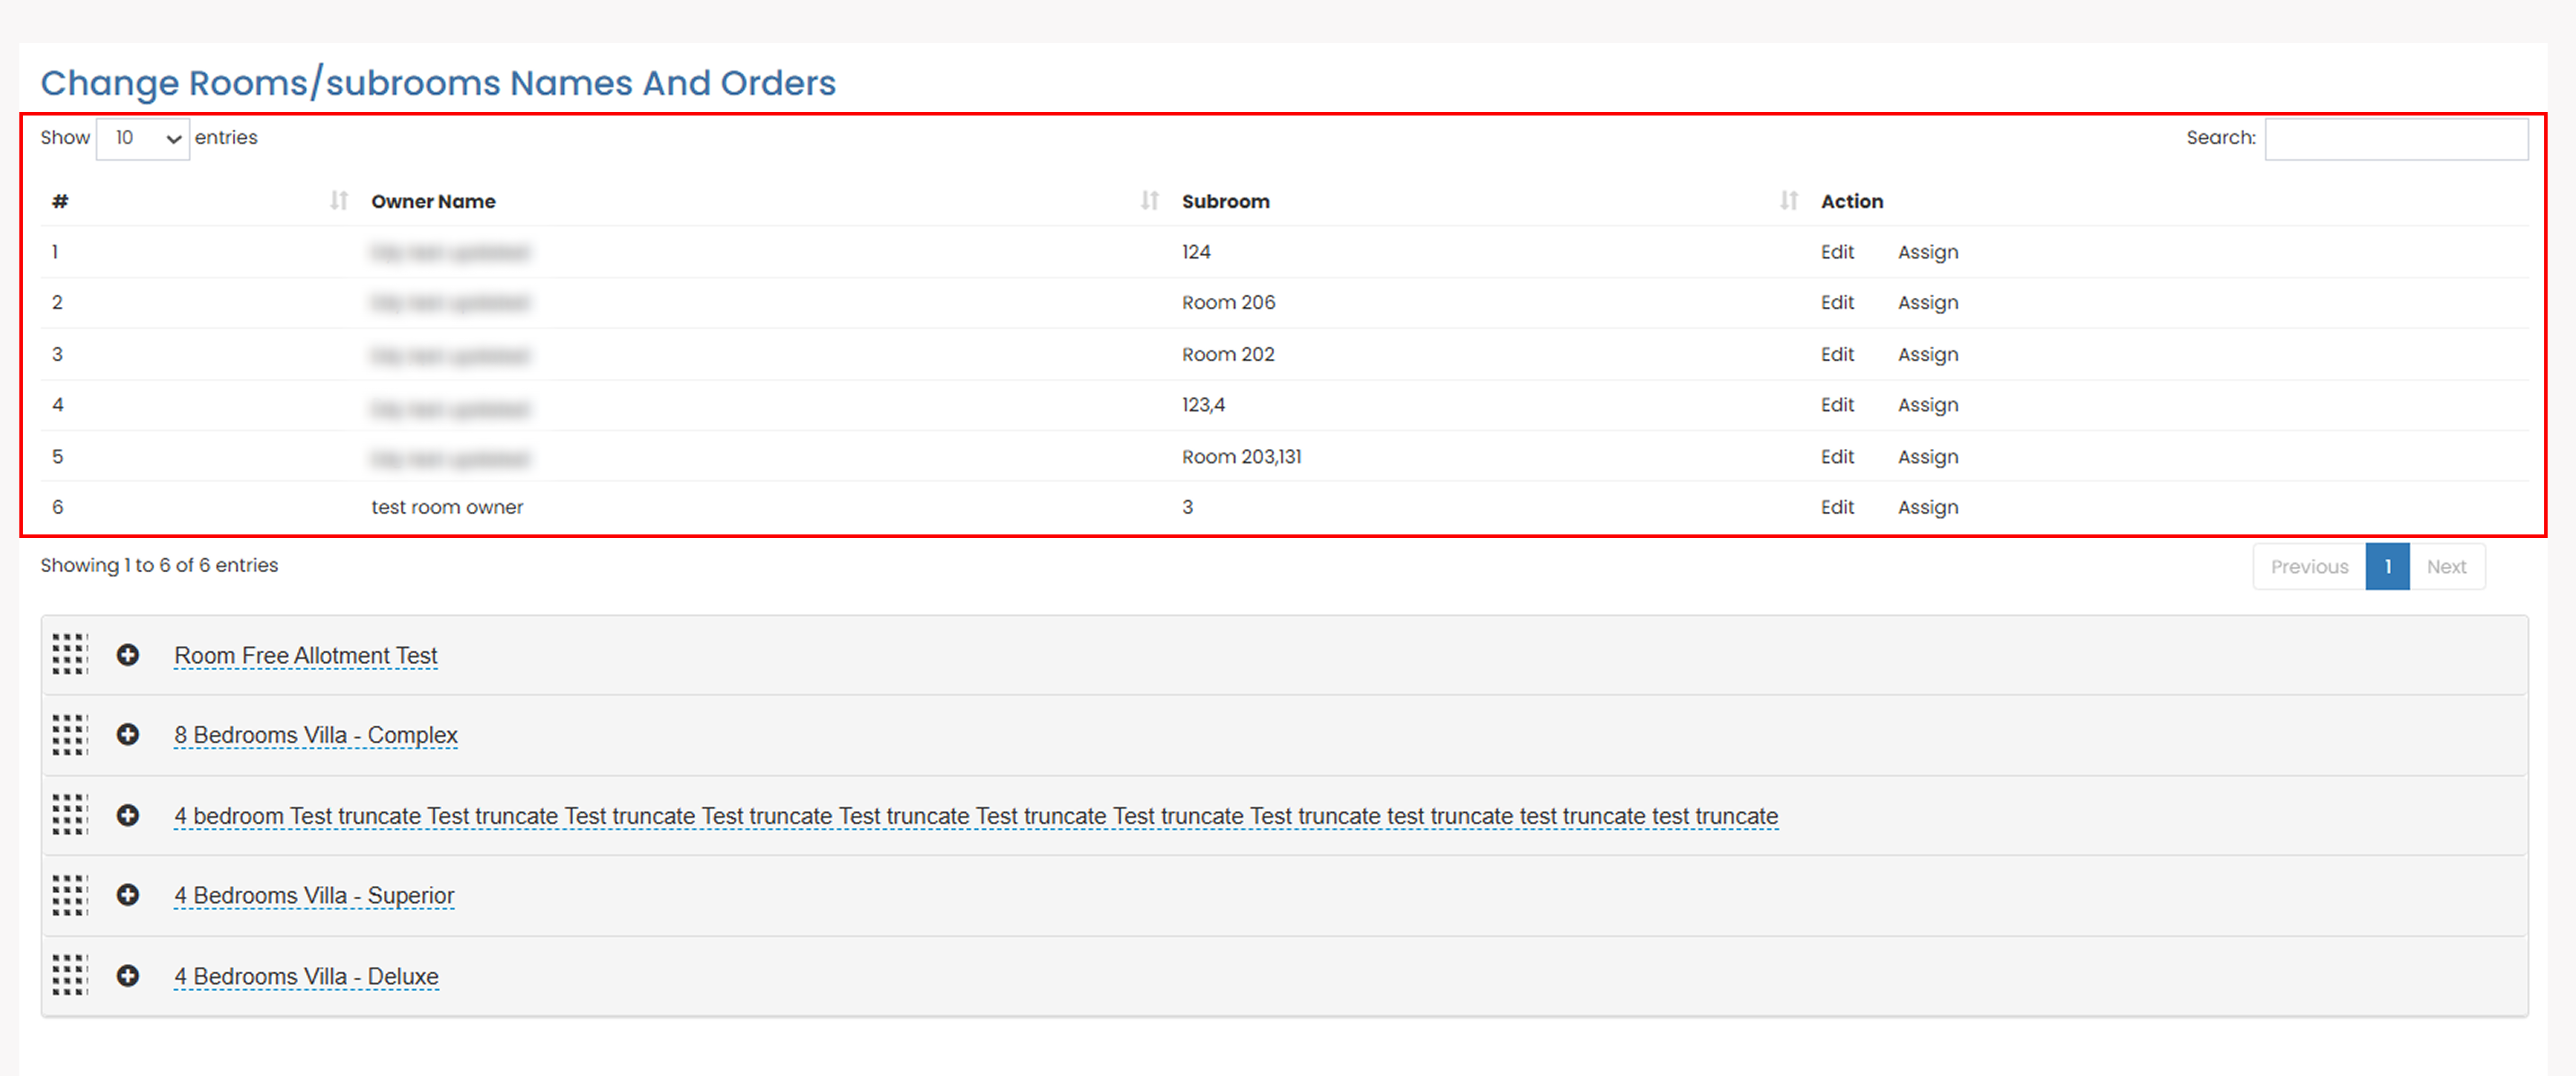
- In the Group List, click Assign for the owner group.

- Select the rooms or subrooms using the available checkboxes.
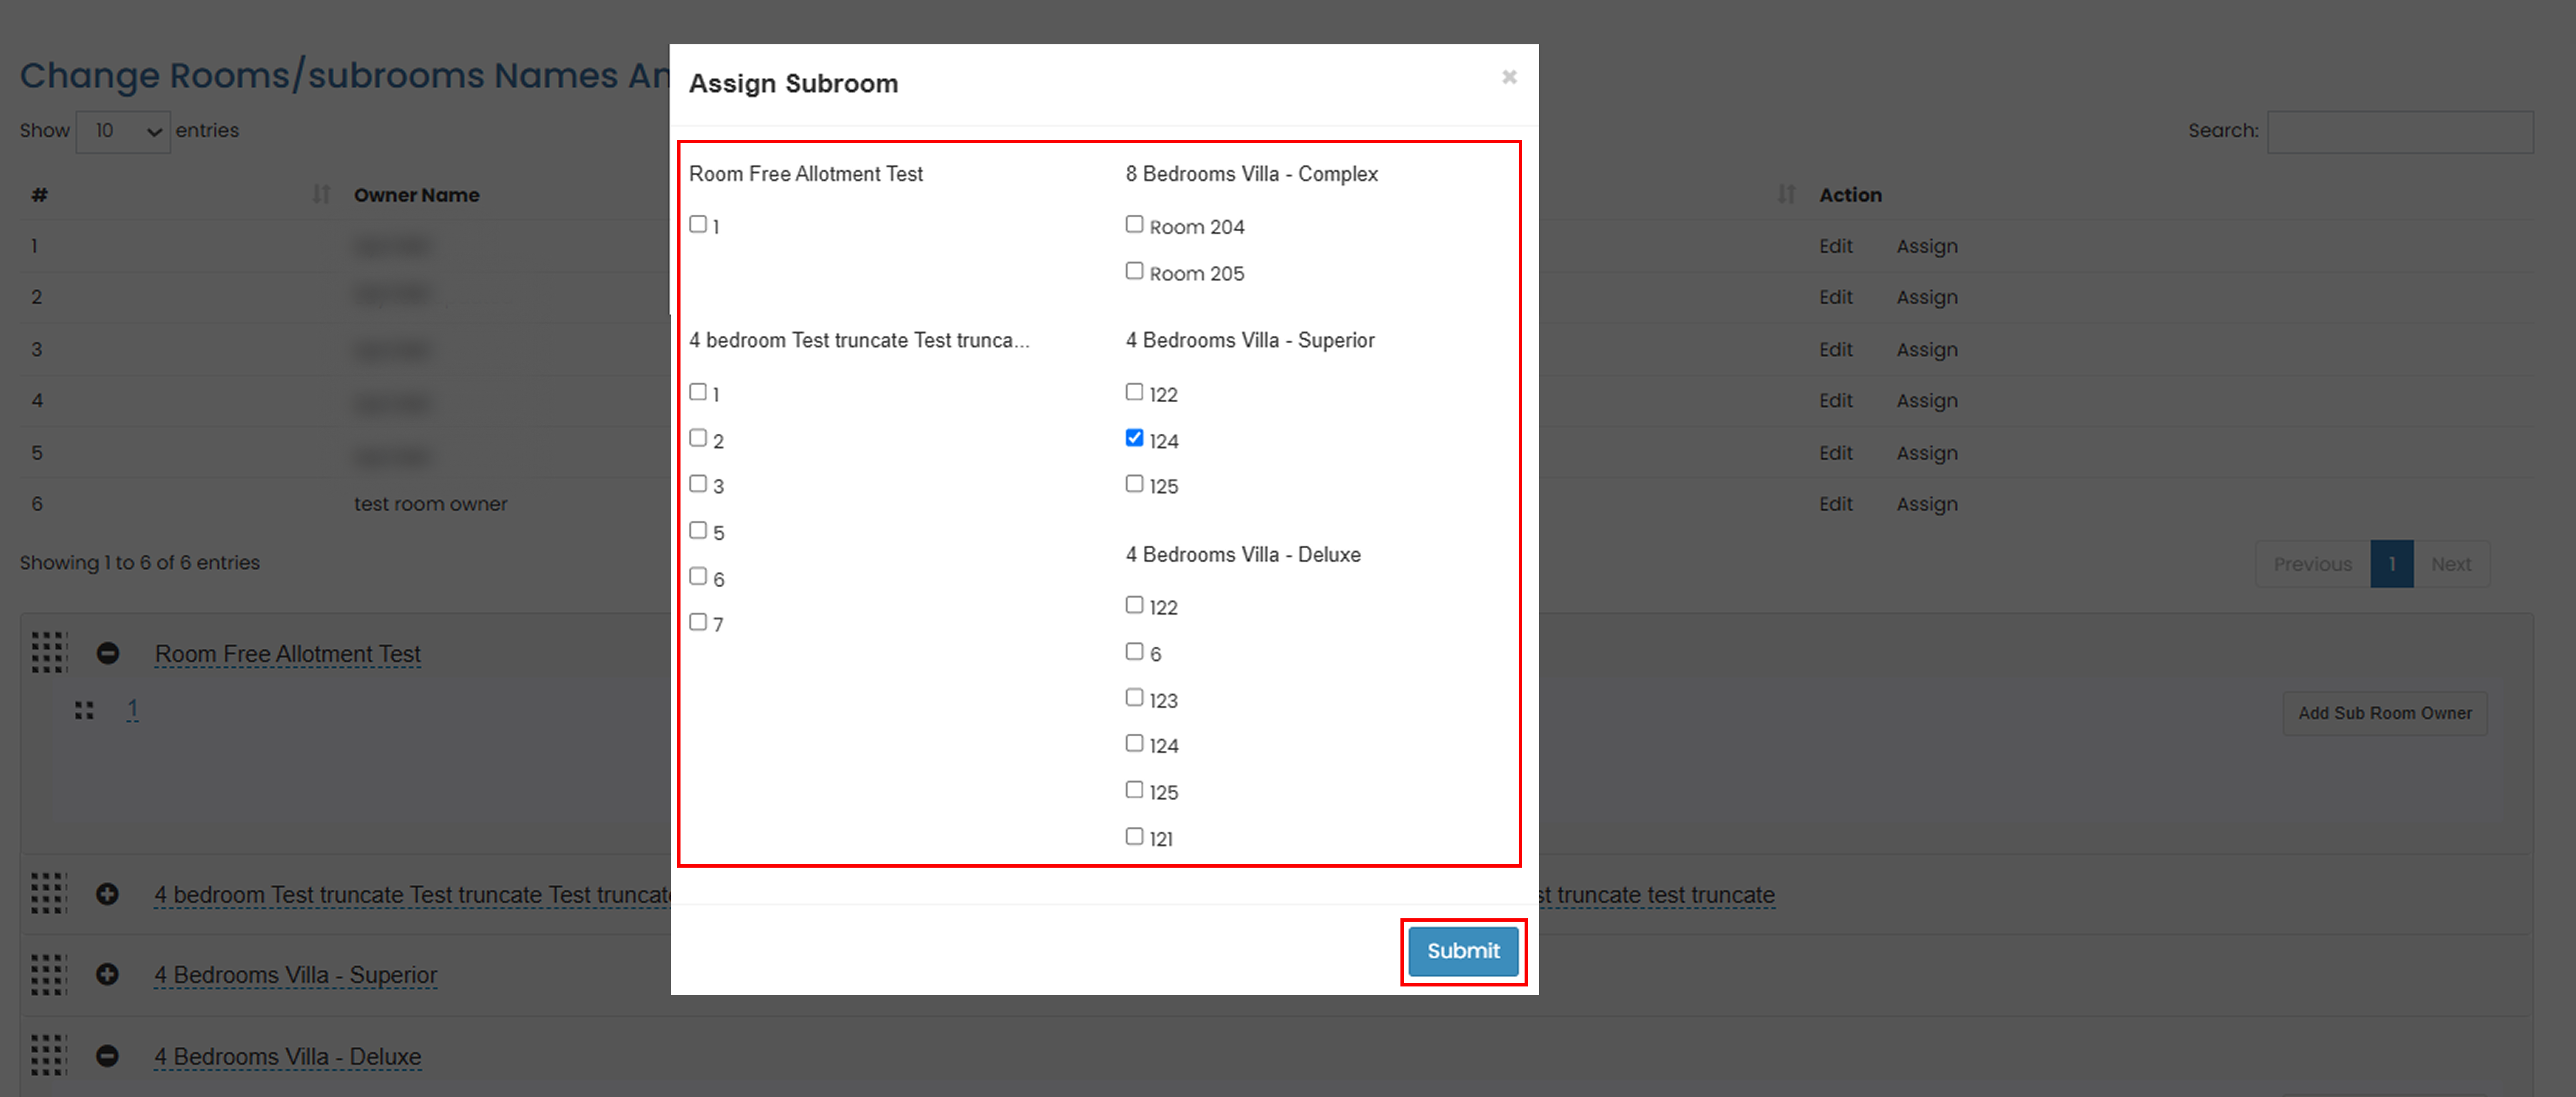
- Click Submit to apply the assignment.
How to Modify Assigned Rooms
You can update the rooms or subrooms assigned to an owner group at any time.
- In the Group List, click Assign for the owner group you want to modify.
- Uncheck the rooms or subrooms that should no longer be assigned to the group. And select the rooms or subrooms that you want to assign.
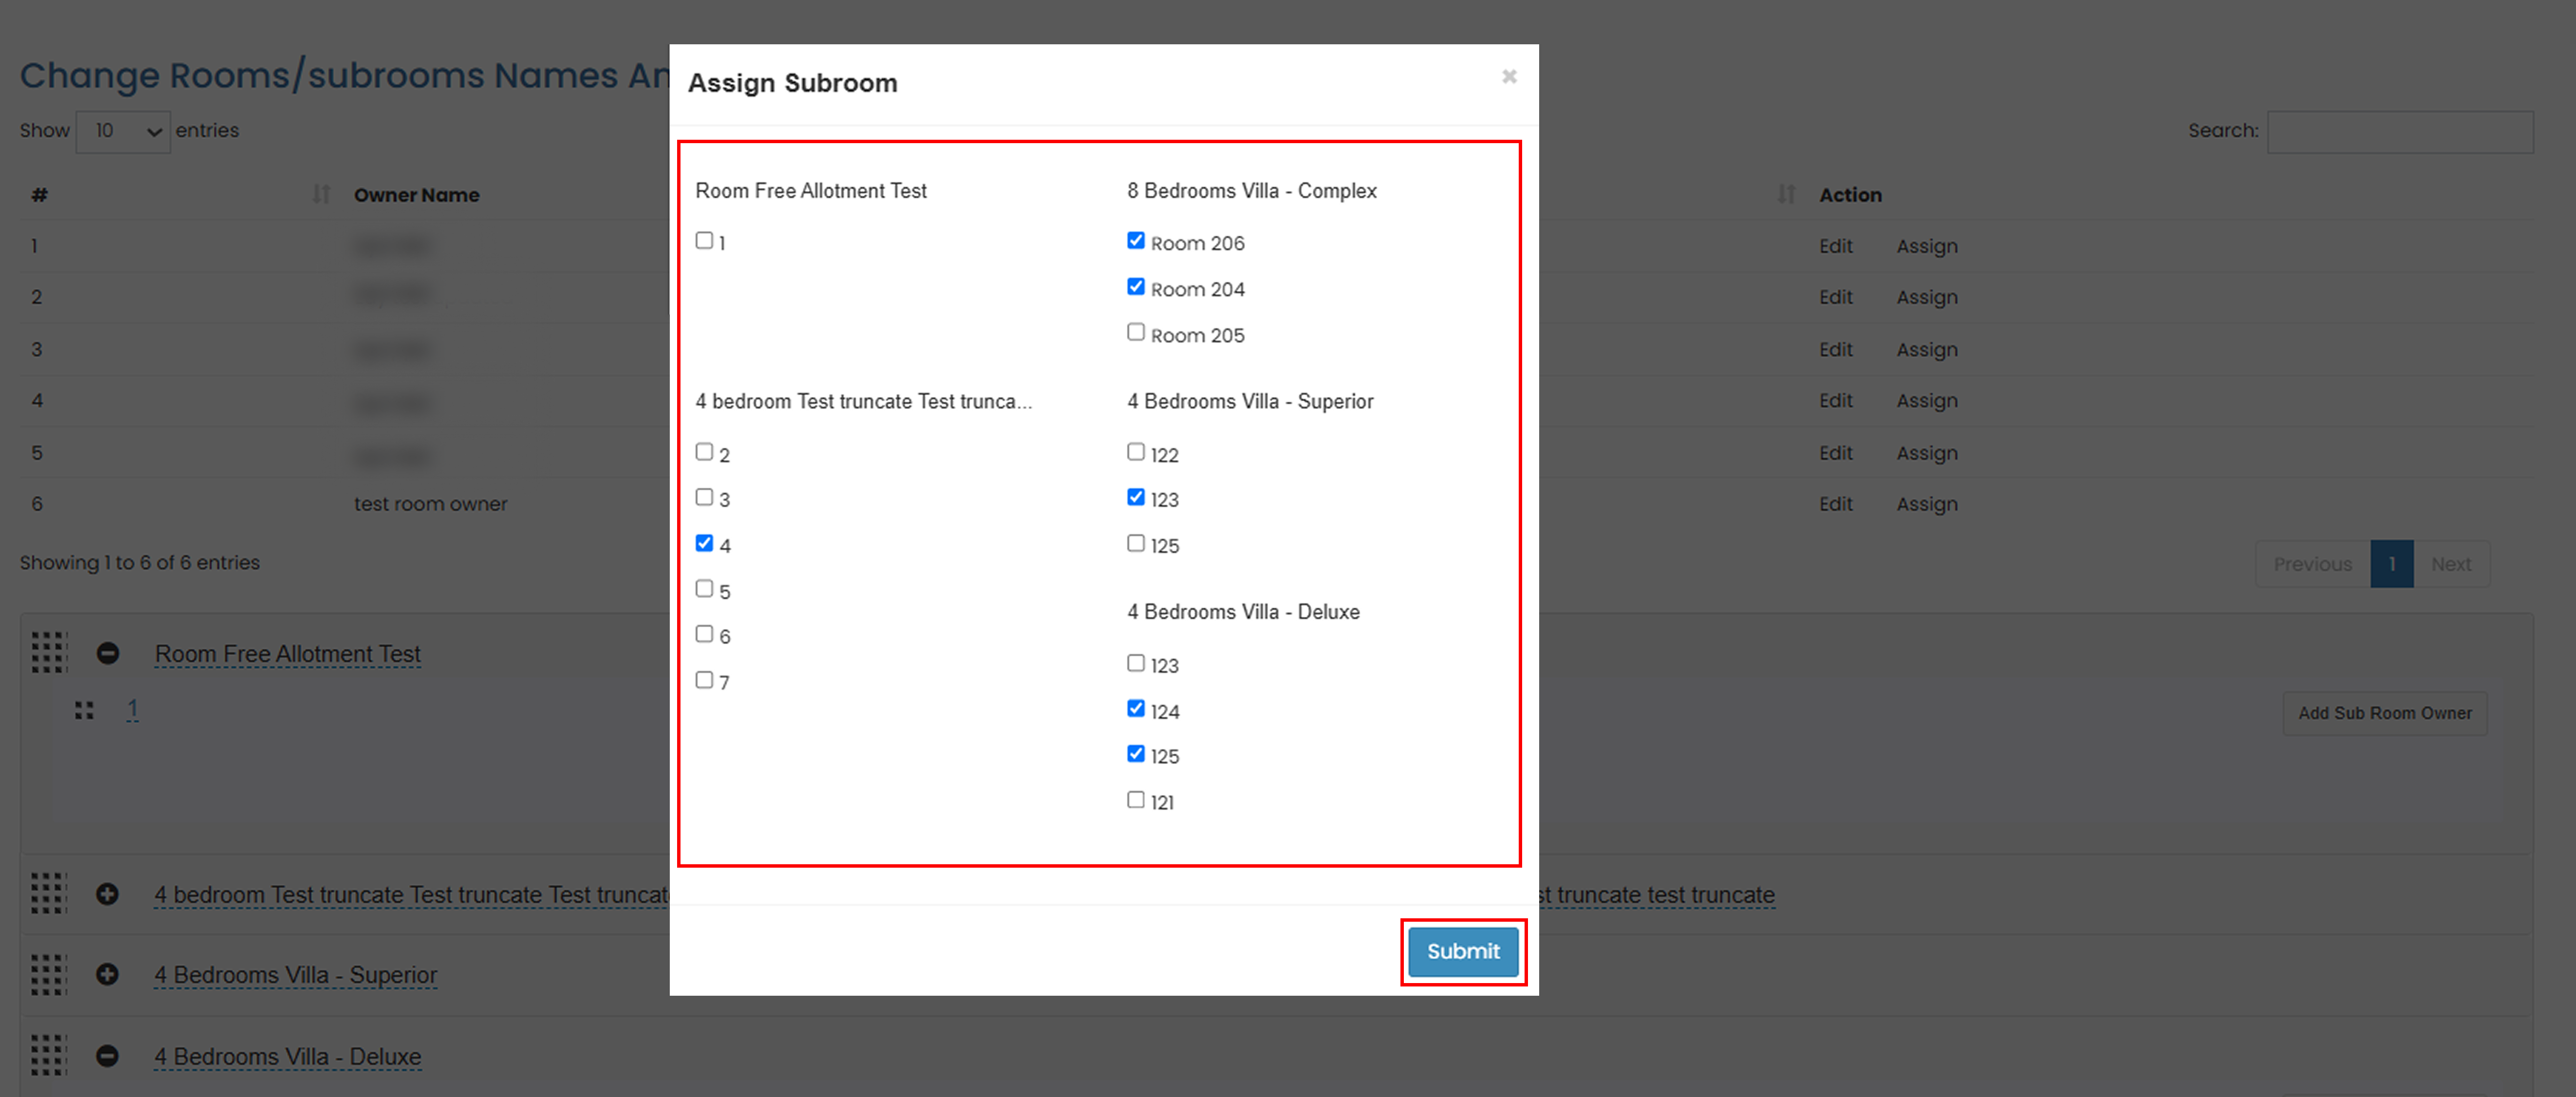
- Click Submit to apply the changes.
- Verify the update in the Room List to ensure that the owner assignment has been updated correctly.
How to Modify Owner Details
You can update an owner's information at any time. Changes made to an owner group will automatically apply to all rooms and subrooms assigned to that owner.
- In the Group List, click Edit for the owner group you want to modify.

- Update the owner information as needed.
- Click Submit to save the changes.
How to See the Result
Owner assignments are reflected in the Owner Report. Each owner will only see report data for the rooms or subrooms assigned to them. For more information, refer to the Owner Report documentation.
Change Room and Subroom Names
You can rename rooms and subrooms directly from the room list.
- Click the room or subroom name field.
- Enter the new name.
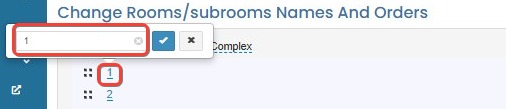
Change Room and Subroom Order
You can rearrange how rooms and subrooms appear on the Booking Chart.
- Drag and drop the room or subroom to the desired position.
- The new order will be reflected on the Booking Chart.

Room or subroom name changes are not reflected
- Refresh the page and verify that the changes have been saved successfully.
- Check the Booking Chart to confirm that the updated name has been applied.
- If the issue persists, try updating the name again and save the changes.
Room or subroom order is not updated
- Ensure the room or subroom has been moved to the desired position before saving.
- Refresh the Booking Chart to view the latest room arrangement.
- If the order is still incorrect, repeat the drag-and-drop process and save again.
Unable to assign a room owner
- Verify that all required owner information has been entered correctly.
- Ensure the email address is in a valid format.
- Refresh the page and try saving the owner information again.
Group List is empty
- The Group List is generated automatically from previously assigned room or subroom owners.
- Assign an owner to any room or subroom first to create an owner group.
- This feature is only available for properties that support multiple-owner management.
Unable to assign multiple rooms to an owner group
- Verify that the owner group already exists in the Group List.
- Ensure at least one room or subroom is selected before saving.
- Refresh the page and try the assignment again if the changes are not applied.
How to Configure Rateplan Extra Charges and Taxes
This section allows you to configure additional charges for extra adults or children, and whether tax should be excluded from the displayed rate.
- In the Settings page, scroll to the section Change Rooms/Subrooms Names and Orders.
- Click the + (plus) icon next to a rate plan to show its charge and tax settings.
- Click the – (minus) icon to hide the details.
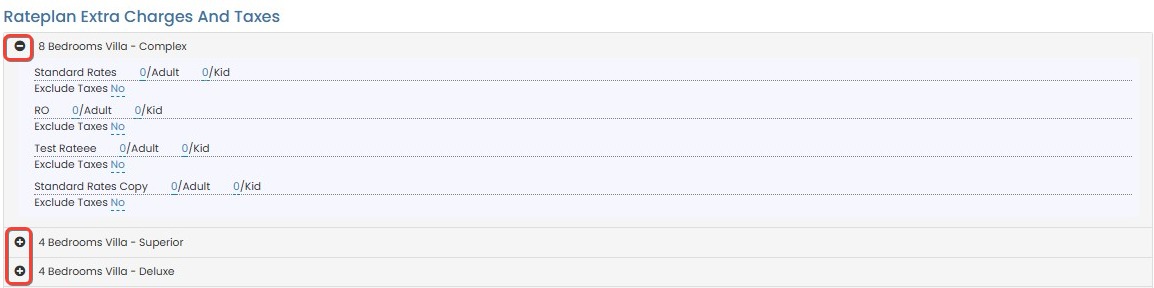
- Click the – (minus) icon to hide the details.
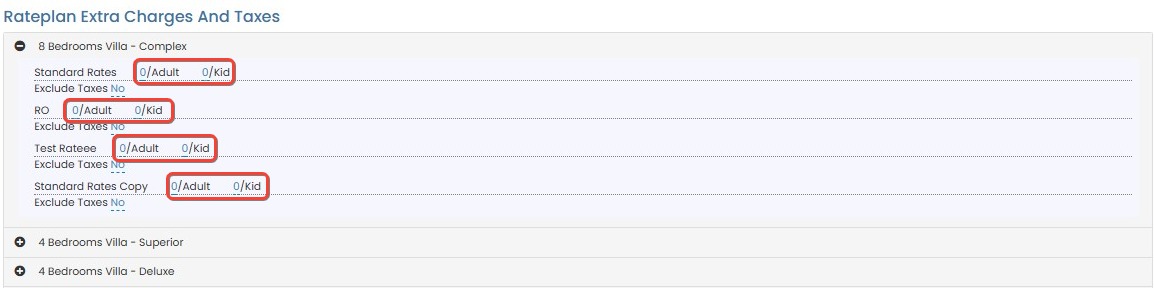
- Set the additional charge rule:
- Click on the number under Adult to edit how many adults are included before extra charges apply.
- Click on the number under Kid to set how many children are allowed without extra charges.
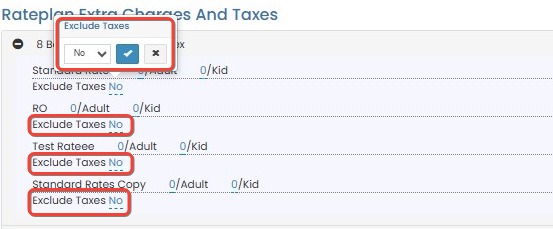
- Set the Exclude Tax option:
- Select Yes to exclude tax from the displayed rate.
- Select No to include tax in the displayed rate.
Cannot expand rate plan details
- Ensure you click directly on the + (plus) icon next to the rate plan name.
- If the icon is unresponsive, refresh the page and try again.
- Make sure JavaScript is enabled in your browser.
Changes to adult or child charges not saving
- After editing the values, ensure you click outside the input field to trigger the save.
- Double-check that you are entering numeric values only.
- If using a custom input method or device (e.g., touchscreen), try switching to a mouse for more precise input.
Exclude Tax setting not applying
- After selecting Yes/No, confirm the changes are reflected in the UI and persist after a page refresh.
- Check if there are any overridden tax settings in the Booking Policy that may affect display behavior.
- Contact an administrator if the system does not apply the change consistently across all rate plans.
How to Set Default Property View on Booking Chart
- Go to Settings > Booking Chart – Default Properties View.
- From the dropdown, select the property you want to display by default when opening the Booking Chart.
- If no property is selected, all properties will be shown by default.
- Click Update Default Properties View to apply the setting.

Dropdown does not display available properties
- Ensure that your user account has access to at least one property.
- Try refreshing the page to reload the property list.
- If the problem persists, clear your browser cache and reload.
Selected property is not saved as default
- Make sure to click Update Default Properties View after selecting the property.
- Wait a few seconds to ensure the system saves the changes before navigating away.
- Verify the update by reloading the Booking Chart page to see if the selected property appears by default.
All properties still showing after setting a default
- This may occur if no default was successfully saved. Repeat the process and confirm selection.
- If the issue persists, check for conflicting settings or user role restrictions that may override the default view.
How to Set Property Management Commission Amount
- Go to Settings > Property Management Commission Amount.
- Enter the commission in the provided field.
- Click Update Agency Commissions to confirm.

Unable to input commission amount
- Ensure the field accepts numeric values only. Avoid entering symbols like
%or letters. - Try clicking directly inside the field and clearing any pre-filled text before typing.
Update button is unresponsive
- Confirm that a value has been entered before clicking Update Agency Commissions.
- If the button is still unresponsive, refresh the page and try again.
Commission update not reflected in reports or bookings
- Allow a few minutes for the changes to propagate across the system.
- Double-check if the commission was saved correctly by revisiting the settings page.
- If the issue persists, verify if your user role has permission to update commission settings.
How to Configure Taxes Logic
- Go to Settings > Taxes Logic.
- Select the applicable tax logic from the dropdown list.
- This setting determines how taxes are applied in calculations across bookings and services.
- Click Update Taxes Logic to apply the selected tax logic.

Dropdown does not show any tax logic options
- Refresh the page to reload dropdown options.
- Check your user role permissions to ensure you have access to modify tax settings.
Unable to click or select an option from the dropdown
- Ensure no browser extensions or scripts are blocking UI elements.
- Try accessing the page from a different browser or in incognito/private mode.
Update does not take effect
- After clicking Update Taxes Logic, wait a few seconds for the system to process the change.
- Reopen the Settings page to confirm that the new logic is saved.
- If the selected logic is not applied in new bookings, confirm with support if caching or system delays may be involved.
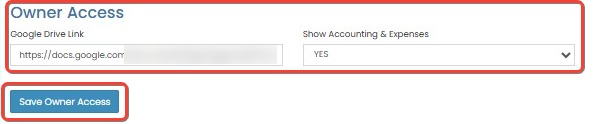
How to Manage Owner Access
- Go to Settings > Owner Access.
- In the Google Drive Link field, enter the URL if you want to share documents (optional).
- From the Show Accounting & Expenses dropdown, choose:
- YES to allow owners to view accounting and expense data.
- NO to restrict access to accounting features.
- Click Save Owner Access to apply the changes.
Google Drive link is not saving or disappears after saving
- Make sure the URL is a valid Google Drive shareable link (starts with
https://drive.google.com/). - Avoid using shortened or expired links.
- Try removing extra spaces before or after the link.
Owner cannot see accounting and expenses even after enabling access
- Confirm that the correct owner account is logged in.
- Check if the Show Accounting & Expenses option is set to YES and changes were saved successfully.
- Refresh the owner’s dashboard to reflect the latest permission settings.
Dropdown selection resets after clicking Save
- Ensure a stable internet connection before saving.
- Wait a few seconds after clicking Save Owner Access to allow the system to update.
- If the issue persists, try clearing your browser cache and reloading the page.
How to Configure Integration Settings
- Go to Settings > Integration.
- From the Enable Dormakaba dropdown, choose:
- YES to activate Dormakaba integration.
- NO to disable it.
- In the Dormakaba Endpoint field, input the endpoint URL provided by the Dormakaba system.
- Click Save Dormakaba Integration to save your configuration.

Cannot save Dormakaba integration settings
- Ensure the Dormakaba Endpoint URL is correctly formatted (starts with
http://orhttps://). - Verify you have stable internet connection during saving.
- Check if you have sufficient user permissions to update integration settings.
Dormakaba integration does not activate after enabling
- Confirm that you clicked Save Dormakaba Integration after selecting YES.
- Verify that the endpoint URL is reachable and correct. Try opening the endpoint URL in a browser to test connectivity.
- Check Dormakaba system status to ensure no outages or maintenance are ongoing.
Error message appears after saving settings
- Review the error details for clues (e.g., invalid URL, authentication issues).
- Contact support with the error message for further assistance.
Integration behaves inconsistently or data is not syncing
- Confirm the endpoint URL has not changed or expired.
- Re-save the integration settings to refresh the connection.
- Check logs or system notifications for integration errors.
How to Setting Breakfast Period
Set up the breakfast period in the Breakfast Reporting system to define applicable date ranges, system restrictions, menu configurations, and revenue calculations
Configure Breakfast Period
- Select Setting from the Front Office menu, and go to Breakfast Period section.
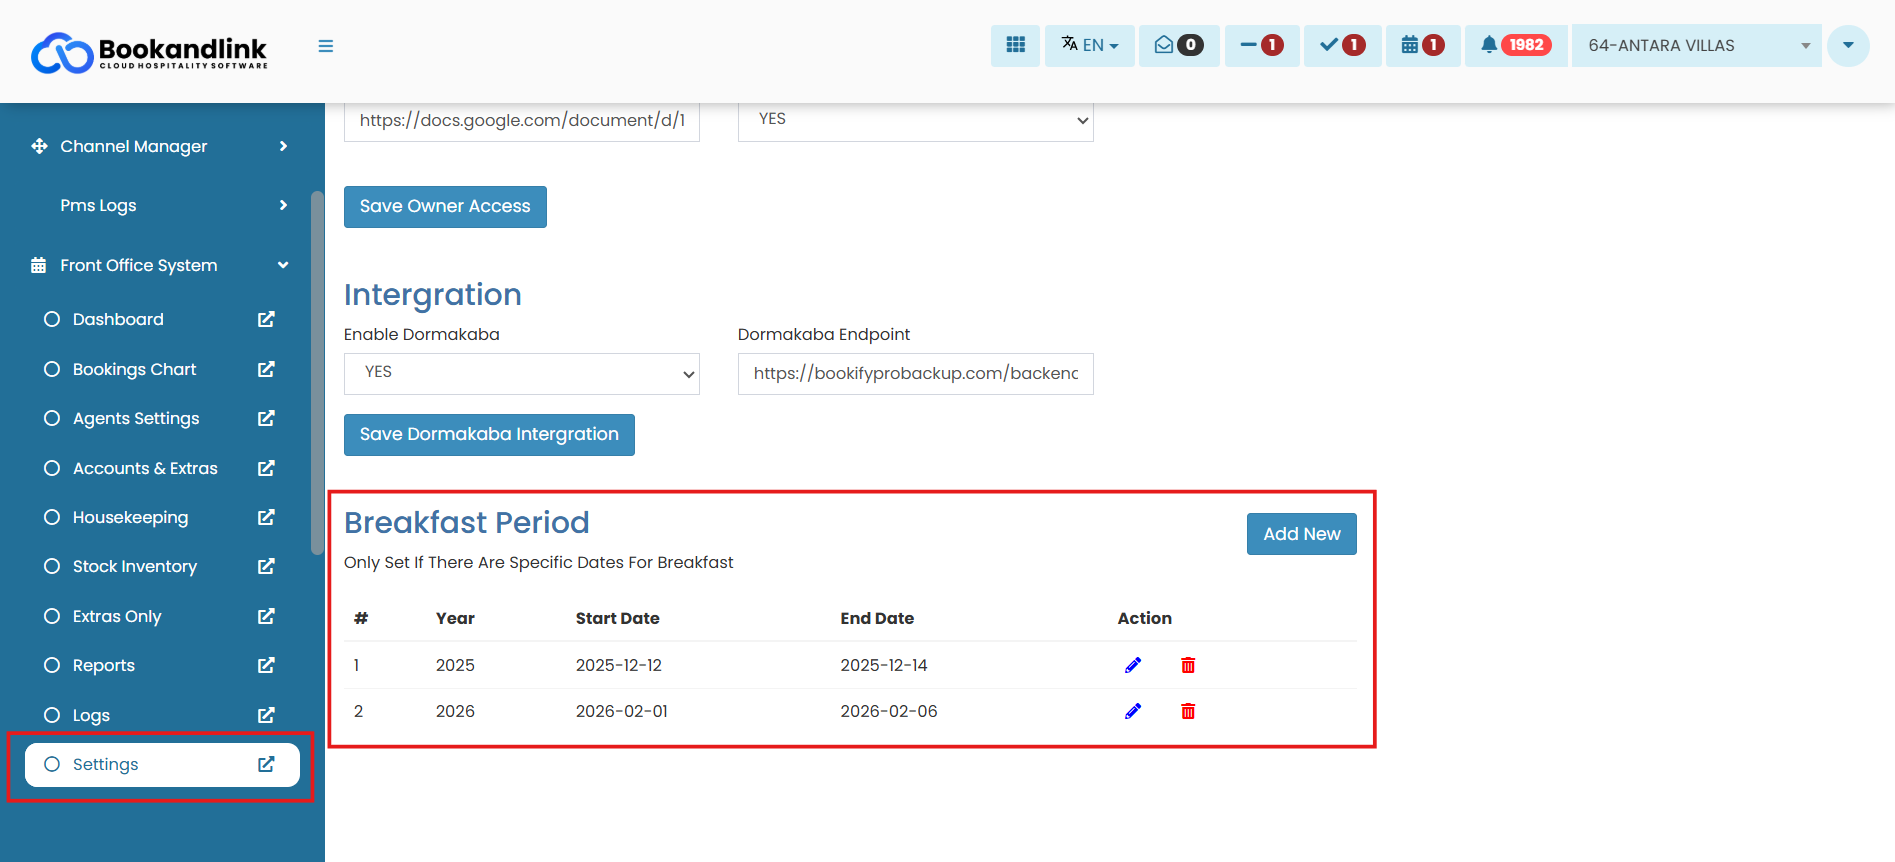
- Review the existing configuration and ensure the current period matches your operational requirements
- If updates are required, adjust the reporting date range to determine the period used for breakfast data collection and reporting.
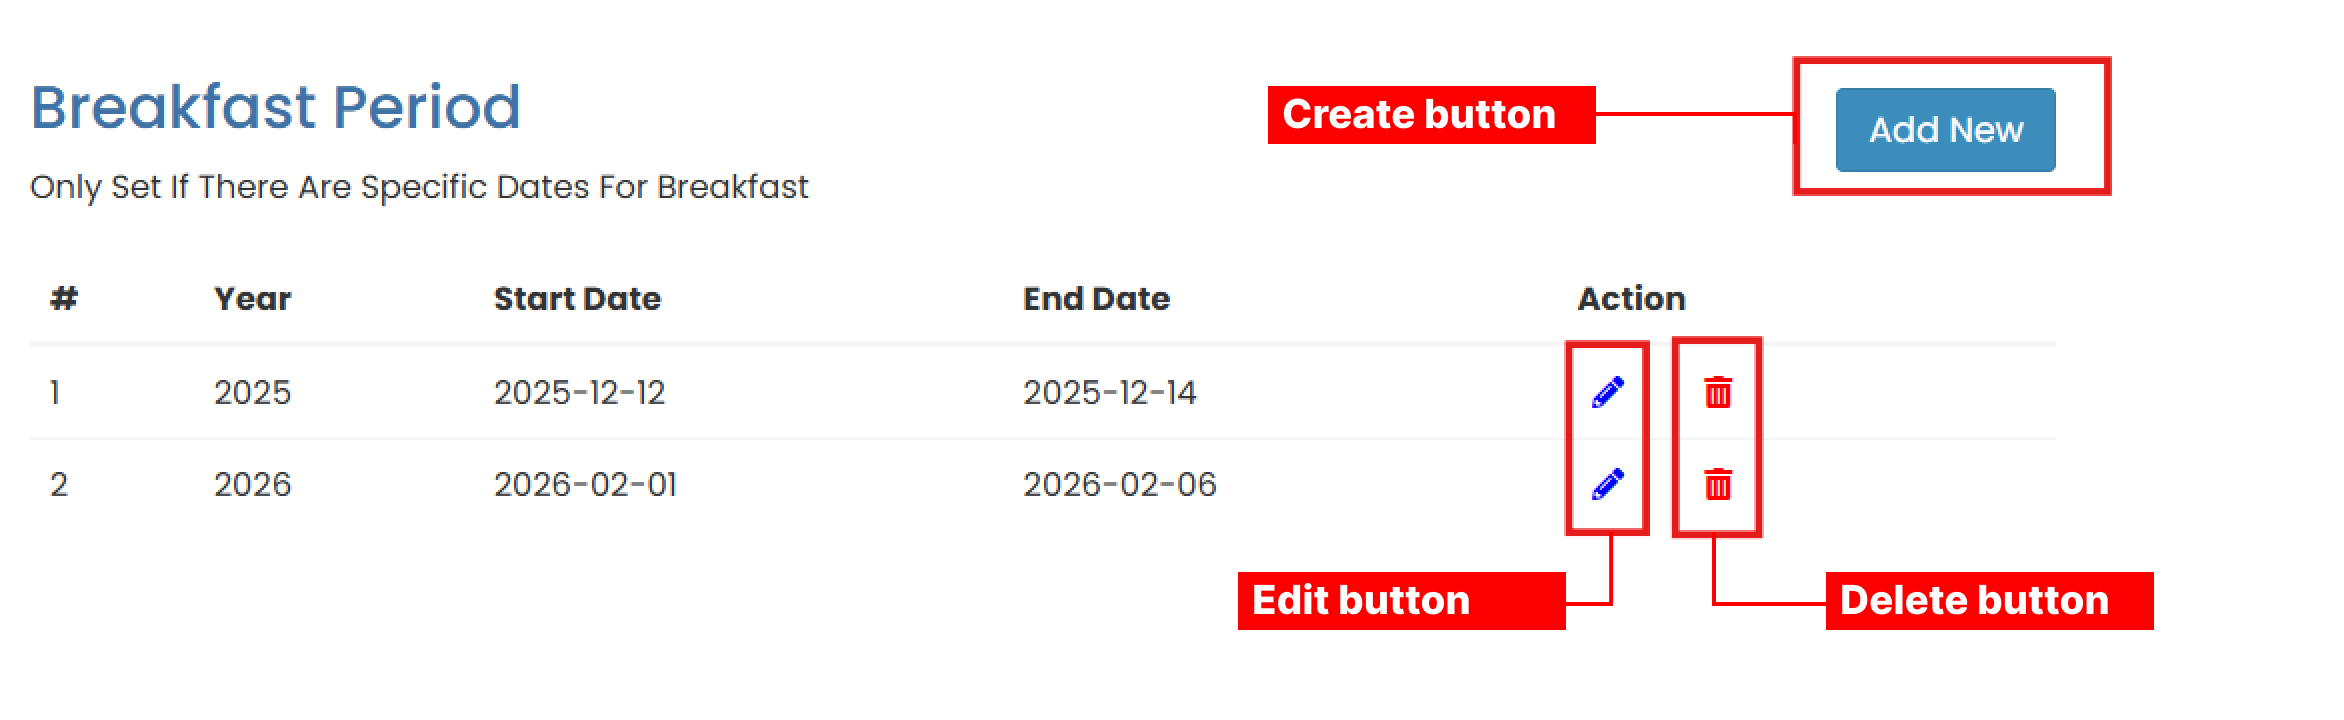
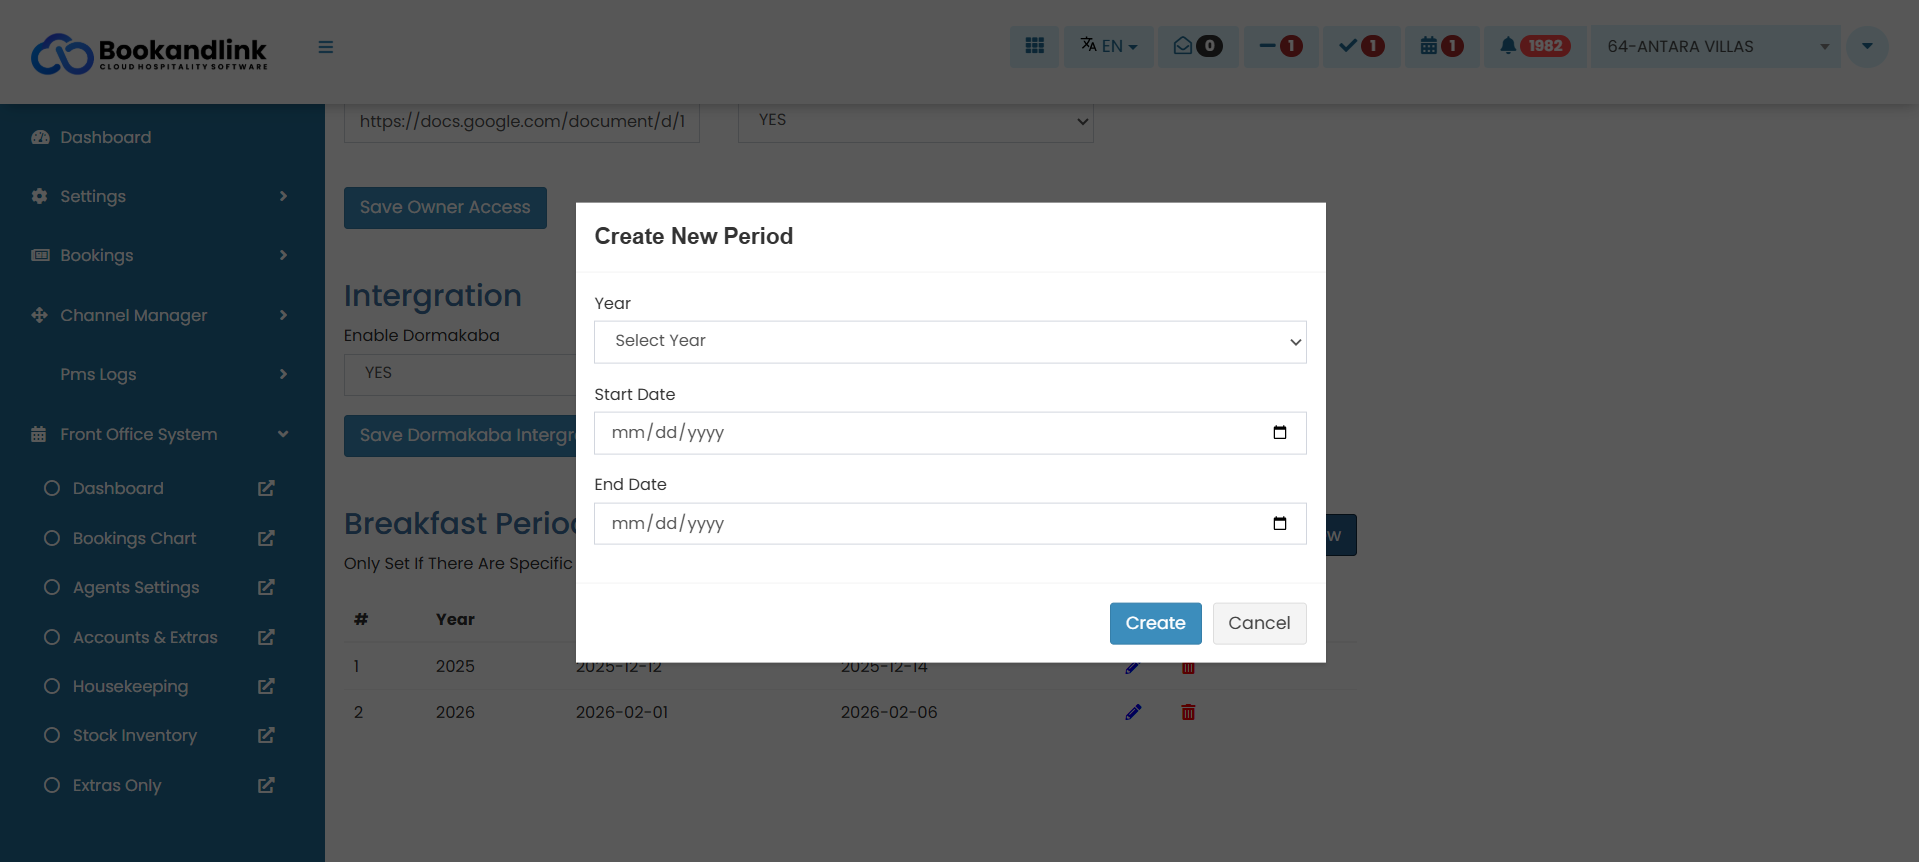
- Create
- Add a new period by entering the year, start date, and end date.
- Add a new period by entering the year, start date, and end date.
- Edit
- Update the year, start date, or end date of an existing period.
- Delete
- Remove an unused period by clicking the delete (trash) icon.
- Create
Verify Breakfast Period Configuration
To review the applied breakfast settings:
- Navigate to Reports from the Front Office menu and go to Breakfast Report
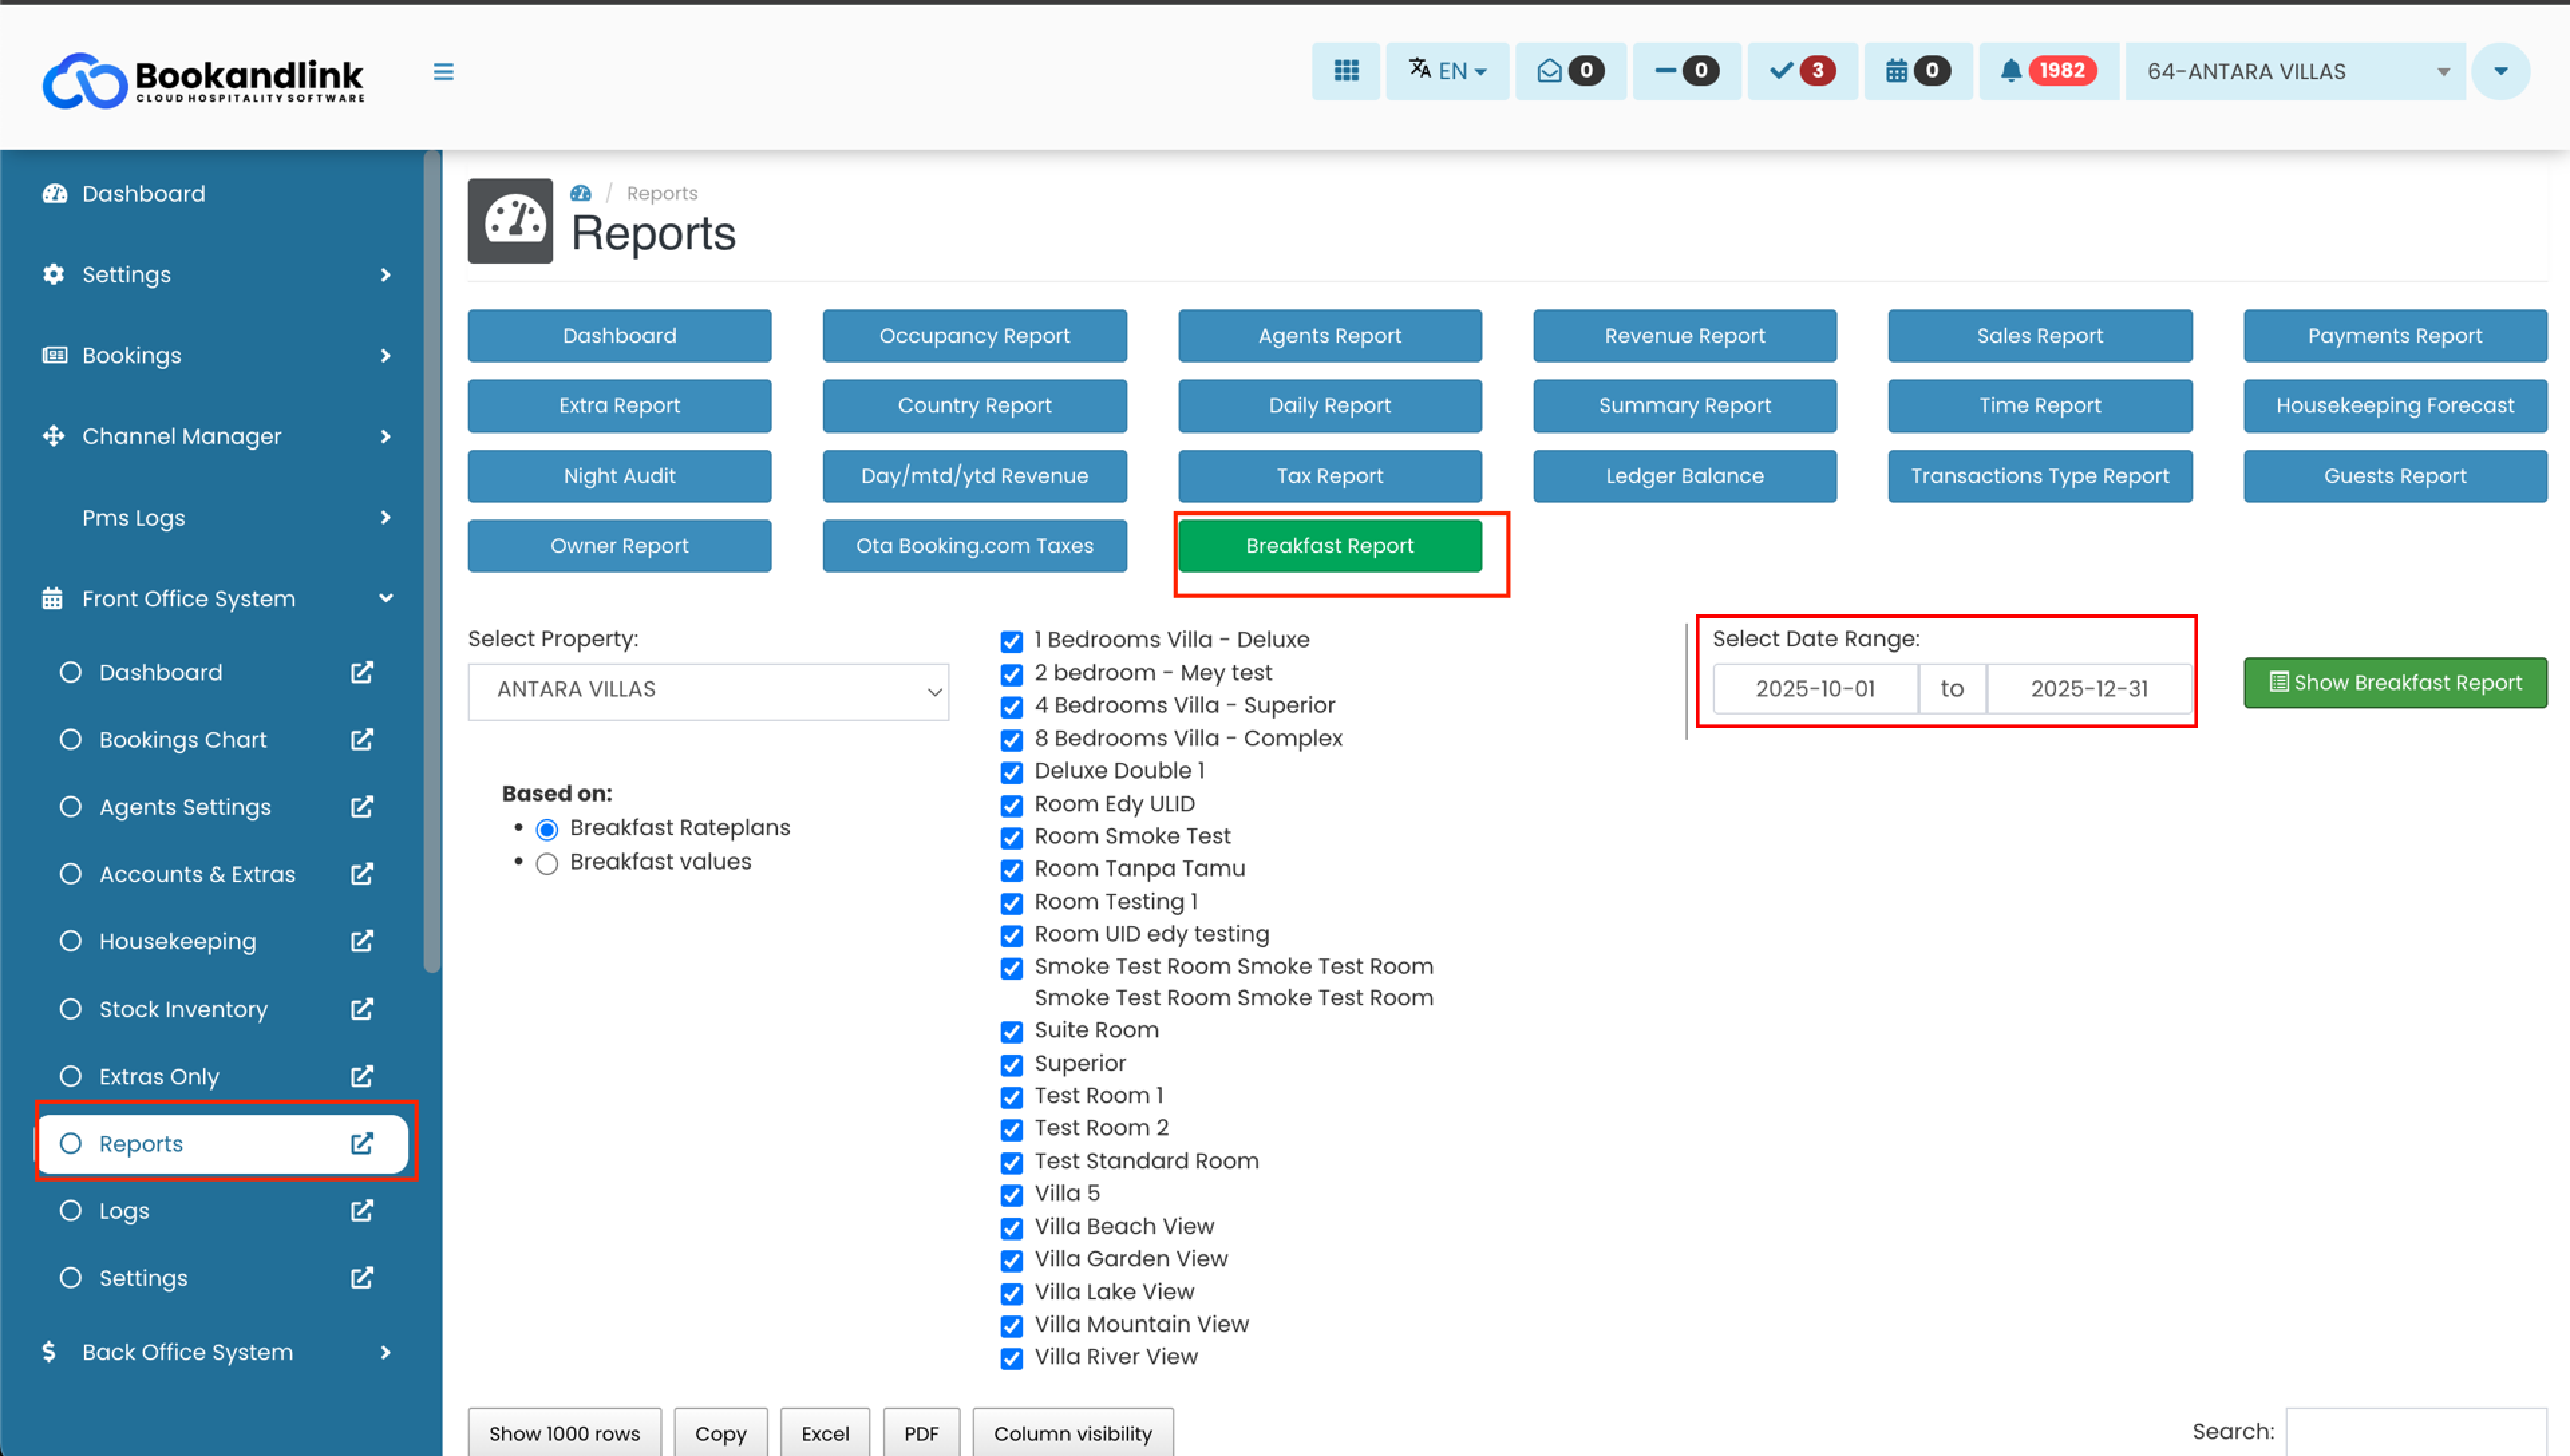
- Confirm that the configured date range (e.g., October–December) is displayed correctly.
- Breakfast values will appear only for configured periods; otherwise, the report will display 0.

Changes are not saved
- Ensure you have the appropriate user permissions to modify settings.
- Wait for the success confirmation message before leaving the page.
- Refresh the page and reapply the changes if necessary.
Unable to create a new Breakfast Period
- Ensure the start and end dates fall within the selected year.
- Do not set the start date and end date to the same day.
- Set the start date earlier than the end date.
- Create only one Breakfast Period for each year